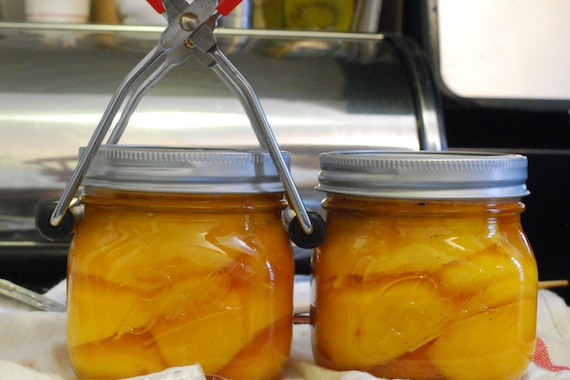
L’Shana Tova Vanilla Peaches

L’shana Tova to all of you! A sweet and healthy new year!

For this month’s Tigress Can Jam ingredient, The Peach, I opted for something simple, yet delicious. A few things led me to go this route:

  1. With the holidays over the past week, I’ve been busy and spent a few evenings away from my apartment, limiting the amount of time I had to work on my canning.
  2. We received 4 peaches from our fruit share this week, and all but one of them was eaten before I had a chance to can!
  3. We had a TORNADO in Queens last night! I was driving back from Long Island when I started being pummeled with rain and lightning and thunder lit up the sky. I am lucky that I have an Aunt and Uncle en route, and so I stopped there to wait out the traffic and watch coverage of the storm on TV… My Thursday evening canning plans were foiled! We’re definitely fortunate that neither us nor our car was in Forest Hills during the height of the storm. While we did have damage inside our apartment (screens blew out of our windows, dirt was spattered on the ceiling and walls of our bathroom, there were leaves in the bedroom, rugs strewn about, etc) we were lucky compared to many people in the area. I’ve posted some pictures below that Matthew took over the past day… Pretty scary stuff!

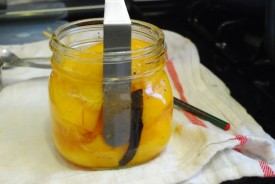
Sooooo back to canning — In order to make the 9/17 deadline, I had to do something QUICK today before we leave for Yom Kippur this afternoon. In light of how CRAZY the situation is with the tornado in Queens, and inspired by the Jewish Holidays, I decided to do a simple peaches in syrup recipe. During the Jewish New Year it is traditional to eat sweet foods to symbolize the sweetness to come in the new year. Therefore I opted for heavy syrup, and added a bit of extra flavor with a vanilla bean.

L’Shana Tova Vanilla Peaches

Recipe adapted from Ball Complete Book of Home Preserving; yield: 2 wide-mouth pint jars

  • 5 peaches
  • 1 cup sugar
  • 1 cup water
  • 1/2 vanilla bean, split and cut in half
  1. Prepare canning jars, lids and boiling water canner. Read HERE for more info.
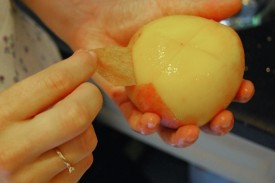
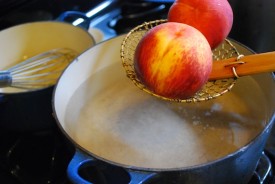
  2. To peel peaches, put large pot of water on to boil, and score the non-stem end of the peach with a sharp pairing knife. Prepare a large bowl of ice water. When the water boils, put in the peaches, 2 at a time, for 60-90 seconds, then remove and place immediately in the ice water. The skin should slip right off.
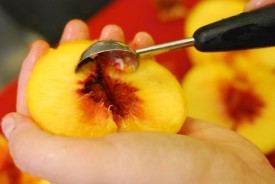
  3. Cut peaches in half, remove pit and scoop out core. Quarter and set aside. (Toss with lemon to prevent browning if you will not be proceeding with recipe immediately.)
  4. Heat up water and sugar over medium heat, stirring to dissolve sugar. Take care to not boil this mixture. Add split vanilla bean.
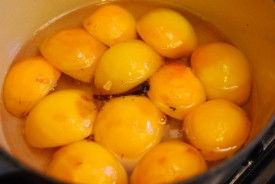
  5. Add peaches cut side down, and heat on high for 1 minute until heat through.
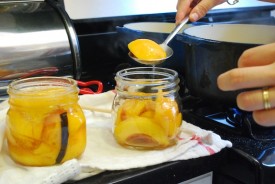
  6. Using a slotted spoon, pack hot peaches, cut side down, overlapping them, leaving 1/2 inch headspace. Ladle hot syrup into jars, tucking in the vanilla bean in each jar.
  7. Remove air bubbles, adjust headspace, and add more syrup if necessary.
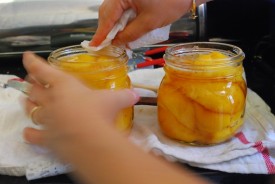
  8. Wipe rim, center lid, and screw on band until fingertip tight.
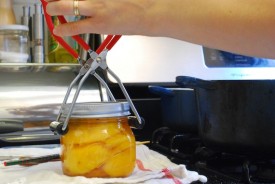
  9. Process for 20 minutes in boiling water canner.

The Aftermath: Forest Hills Storm Pictures:


3 Salads for a Beach Picnic

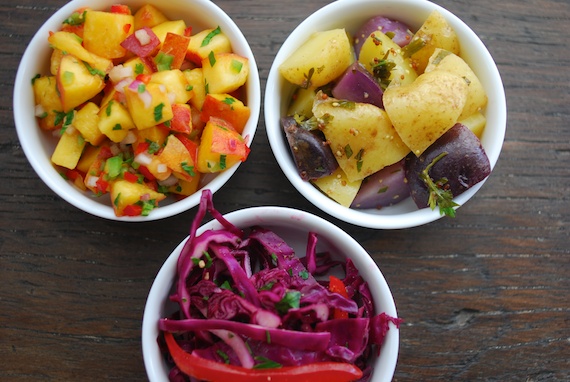
A few months ago we had a revelation: There was a beach…IN QUEENS! Jacob Riis Park is due south of us, and (without traffic) only 30 minutes away. Needless to say with the heatwaves this summer we’ve been spending many-a-weekend there. We always pack our own food, since the concessions there aren’t that hot. This past weekend we were meeting foodie friends there for a beach picnic. With the abundance of CSA produce in my fridge from the past week, I whipped up these 3 salads. Together with some sandwiches, homemade hummus, and tomato salad that our friends made, we were SET! EVERYTHING below except the red cabbage and jalepeno is from our CSA.  Local food at a local beach, nothing beats it.

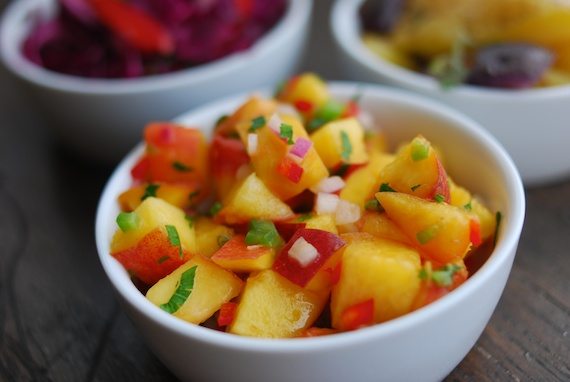
Peach Salsa

  • 4-5 peaches, chopped
  • 1/2 red onion, diced
  • 1/2 red pepper, diced
  • garlic chives and parsley, chopped
  • 1 japepeno, seeds/ribs removed, diced
  • Rice wine vinegar
  • Salt, pepper
  1. Mix all ingredients. Season with salt and pepper. Easiest recipe ever.

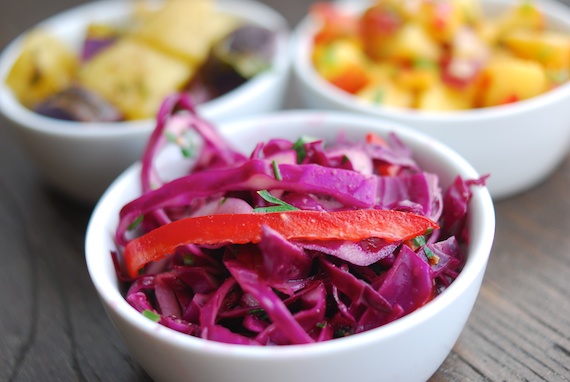
Red Cabbage Slaw

  • 1/2 large or 1 small red cabbage, cored and shredded
  • 1 red pepper, julienned
  • Parsley
  • 1 T Dijon mustard
  • 1 T Apple cider vinegar
  • 1 T Grapeseed oil
  • Salt, pepper
  1. Toss sliced cabbage and red pepper with 1 teaspoon salt, set aside for 10 minutes
  2. In a small bowl, mix mustard and vinegar, whisk in oil
  3. When cabbage softens a bit, toss with dressing, and parsley, season with pepper

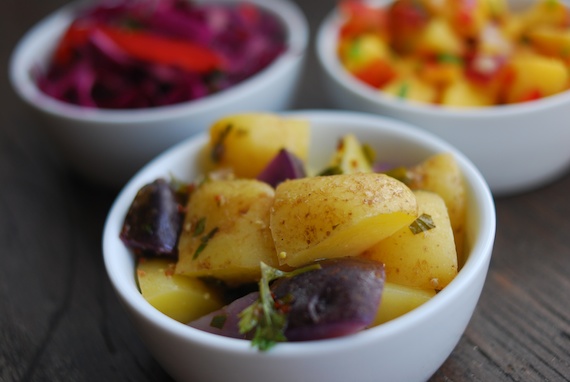
Potato Salad

  • Quartered new potatoes, steamed until JUST done
  • 1 T whole seed mustard
  • 1 T white wine vinegar
  • 2 T olive oil
  • Parsley, salt, pepper
  1. Mix mustard, oil and vinegar in a large bowl.
  2. When potatoes are just about done, remove from steamer and place in bowl with dressing. Toss, and set aside for 5 minutes.
  3. Toss with parsley and season with salt and pepper.

Matthew’s photos of Jacob Riis Beach, our new summer home:

August Can Jam: Homemade Ketchup

It’s not August until the tomato crop comes in, so it’s no surprise that this month’s Tigress Can Jam ingredient is the tomato. Fittingly, Golden Earthworm delivered 5 pounds of globe tomatoes with our regular vegetable share this week. Since I’m already getting a large share of plum tomatoes in a couple of weeks that will be devoted to “regular” canned crushed tomatoes, I wanted to have fun with these and try something I’ve been wanting to make for a while.  I have to admit, I was always a little reluctant to make homemade ketchup since it seemed quite labor intensive. But then I thought about how AWESOME it would be to top my NY State BOG burgers with NY State ketchup, and all hesitancy went out the window. In the recipe below, the tomatoes, onions and garlic are all from Golden Earthworm. In the end, it wasn’t that labor intensive. Sure there’s a food mill involved, and you steep spices in the vinegar before you use it, but these steps are worth it!

Homemade Tomato Ketchup

Yield: Two 1/2 Pint Jars. Adapted from Ball Complete Book of Home Preserving
  • 1.5 teaspoons celery seeds
  • 4 whole cloves
  • 1 whole allspice
  • 2/3 cup apple cider vinegar
  • 4 pounds tomatoes, cored and chopped roughly
  • 1/2 cup chopped onions
  • 3 cloves garlic, halved
  • Pinch cayenne pepper
  • 1/4 cup sugar
  • 2 teaspoons salt

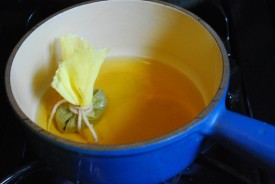
  1. Tie celery seeds, cloves and allspice in cheesecloth, creating a spice bag
  2. Combine vinegar and spice bag, bring to a boil over high heat. When boiling, turn off heat, and let stand for 25 minutes. Discard spice bag.
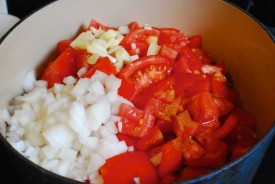
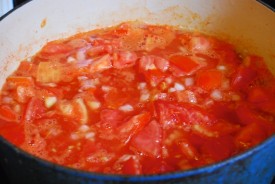
  3. Meanwhile in a large saucepan, combine tomatoes, onion, garlic and cayenne. Bring to a boil over high heat, stirring frequently. Reduce heat and boil gently for 20 minutes. Add vinegar and cook for 30 minutes.
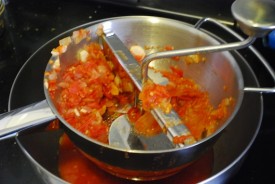
  4. Transfer mixture, little by little, to a food mill, cranking to extract all liquid. Continue until all the tomatoes have been through the food mill. Discard solids.
  5. Return liquid to saucepan, and add sugar and salt. Bring to a boil, then reduce heat and and boil gently until volume is reduced by half, and the ketchup thickens up. This will take around 45 minutes.
  6. Prepare canner, jars, lids. Read THIS if you don’t know what I’m talking about.
  7. Ladle hot ketchup into 1/2 pint jars, leaving 1/2 inch of headspace. Remove air bubbles, adjusting headspace if necessary. Wipe rim, center lid, and twist on screw band.
  8. Process in boiling water canner for 15 minutes. Remove and cool.

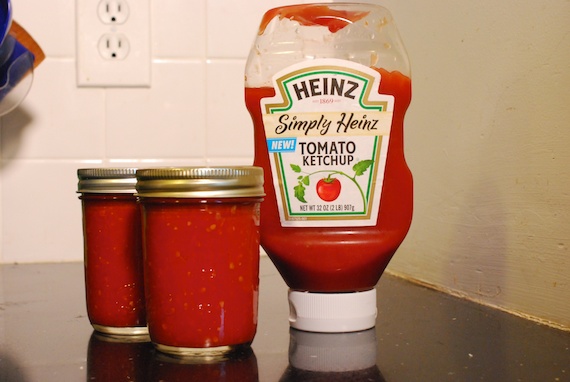
It really tasted like ketchup! I expected it to be more runny, or more tomato-y, but it was very savory, a little sweet, and actually tasted exactly like Heinz (in a good way). However, which would you prefer?! I’m so excited to be able to stock my pantry with this version!

In a New York State of Black Bean Burger

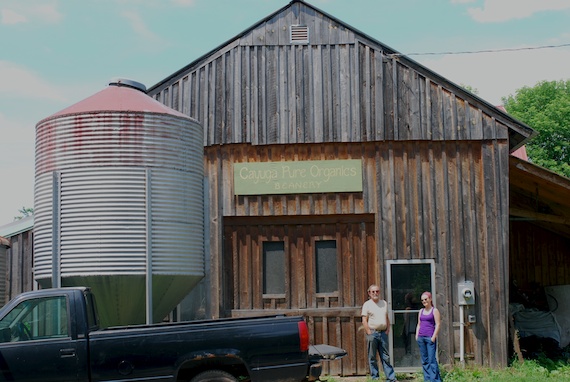
As many of you know, we are members of a CSA, through which we get our glorious, local, organic produce from Golden Earthworm Organic Farm. What you might not know is that we are also members of 2 other CSAs. We get our weekly fruit deliveries from a North fork Fruit farm, Briermere Farms, as well as monthly grain, bean, and flour shipments from Cayuga Pure Organics (CPO). We found that last year during the vegetable and fruit seasons we still bought a lot of those items so we committed to 3 shares of bean, and 2 each of flour and grain.

In June, before our shipments from CPO even started, we took a week-long road trip through the Finger Lakes of Central New York State. When we stopped–unannounced–at CPO’s doorstep, we were welcomed in and lucky enough to get a guided tour of the whole operation from Erick Smith, one of the original founders of CPO. The awesomeness of their Rube Goldberg-esque bean sorting machines deserves its own post, but needless to say, we were so grateful to meet Erick, and thank him personally for the bounty we were expecting to receive. What we did not expect is how exciting it has been to try interesting grains that we never would think to buy, like the oat groats used in this recipe. I concocted this dish to showcase June’s bean (black bean) and July’s grain (oat groats) and flour (cornmeal). I’ve been wanting to try a vegan “burger” for a while now, and this version was delicious. In addition to the CPO ingredients, I used red onion, garlic, parsley and summer savory–all from this week’s Golden Earthworm share. Pretty special that EVERYTHING in the burger (save the spices: salt, pepper, cumin, and homemade chili powder) was grown by a farmer that I have PERSONALLY thanked for growing my food. Pretty special indeed.

BOG (Bean Oat Groat) Burger

  • 2 cups cooked black beans
  • 1 cup cooked oat groats (you can probably use steel cut oats)
  • 1 red onion
  • 1 clove garlic
  • 1/2 cup chopped parsley
  • 1 T fresh summer savory (substitute 1 T fresh or 1 t dried oregano, or any other fresh or dried herb for hard-to-find savory; thyme might also work well)
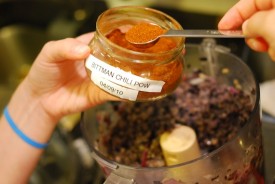
  • 1 T chili powder (we make Mark Bittman’s from How to Cook Everything)
  • 1 t cumin seeds
  • 1/2 – 3/4 cup cornmeal
  • Salt, pepper
  1. Puree in Cuisinart until well blended and soft: black beans, oats, onion, garlic, parsley, savory, chili powder and cumin seeds. Add 1 T at a time of cornmeal until consistency thickens up a bit. Season to taste with salt and pepper. It will still be quite sticky; don’t worry.
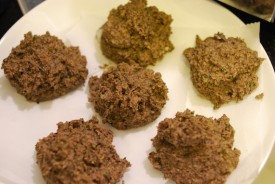
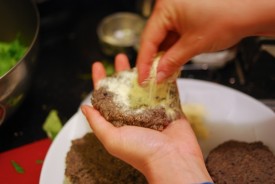
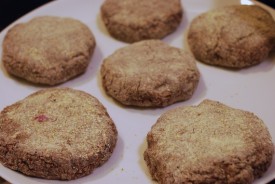
  2. Portion out onto a parchment lined plate. No need to make into patties yet – they first have to chill and firm up in the fridge for 30 minutes, so place plate in fridge.
  3. After 30 minutes, remove from fridge. To press portions into patties, sprinkle each side with cornmeal and press down gently; make sure they are coated lightly with cornmeal on all sides.
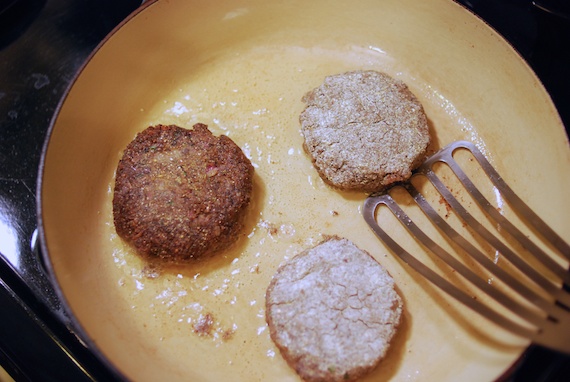
  4. Heat skillet over medium-high heat; add oil (canola, grape seed or safflower oil are great for pan frying). Fry patties on each side until golden. If you’re not eating them right away, place in a 200F oven to keep warm.

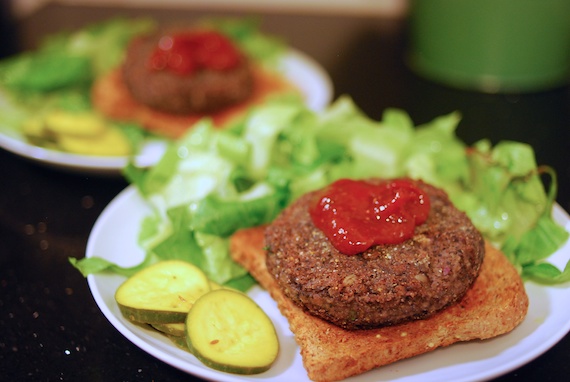
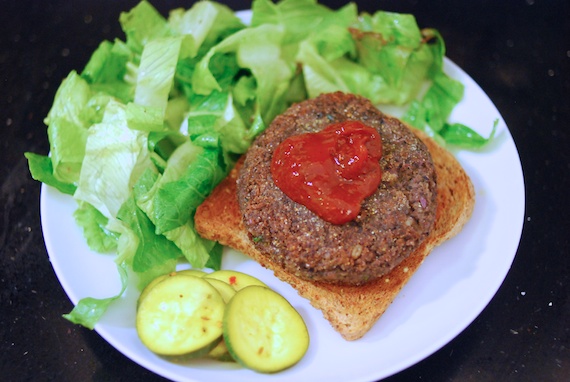
For the curious–did this really taste like a burger? In a word, no. While the outside of the burger firmed up quite nicely, and it held up while frying, the patty as whole wasn’t the texture of a beef burger, but that wasn’t really what I was going for. I wanted a hearty showcase for all the grains and beans, and this technique really came through for me. It was served open-face on a slice of whole wheat (Ezekiel) toast with chili powder ketchup, a side salad and quick zucchini bread and butter pickles.

Stay Tuned for our Finger Lakes Road Trip Post to learn more about Cayuga Pure Organics, the incredible hiking trails of Western New York, and how exactly we fit the 17 bottles of world class wine we bought back to Queens in our Fit.

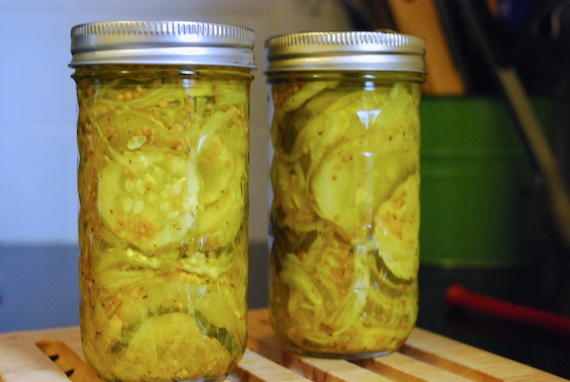
Bread and Butter Pickles: July Can Jam

This classic pickle couldn’t be easier or more delicious, especially since I made it not only with Golden Earthworm‘s organic cucumbers from this week’s CSA share, but with some from a Square Foot Garden that I’ve been working on with a friend. Since I’m down to the wire with this July Can Jam entry, this isn’t going to be the post about Square Foot Gardening in general, but needless to say, it has been an incredibly doable way to grow a wide-range of produce.

Bread and Butter Pickles

Adapted from the Ball Complete Book of Home Preserving

Recipe makes two 15-oz jars

  • 5 cups sliced trimmed pickling cucumbers
  • 2 medium onions, thinly sliced
  • 1/4 cup canning salt (I used kosher salt)
  • 1.5 cups white vinegar
  • 1 cup granulated sugar
  • 1 T mustard seeds
  • 1/2 tespooon celery seed
  • 1/2 teaspoon ground turmeric
  • 1/2 teaspoon grated fresh ginger

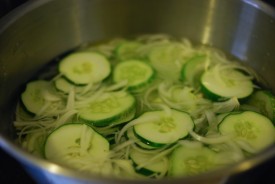
  1. In a stainless steel bowl, combine cucumbers, onions and salt. Mix well, cover with cold water, and let stand at room temperature for 2 hours. Drain, rinse, and drain again.
  2. In the mean time, prepare canner, jars and lids. (See this post for more info.)
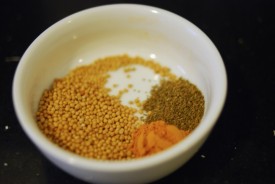
  3. In a large saucepan, combine vinegar, sugar, mustard seed, turmeric, and celery seeds. Bring to a boil, stirring to dissolve sugar. Stir in cucumbers and onions, bring back to a boil
  4. Put grated ginger in one jar. Pack cucumbers/onions into jars, leaving 1/2 inch of headspace. Remove air bubbles, and adjust headspace as needed. Wipe rim, center and place lid (the one with ginger marked with a “G”), screw on bands to fingertip-tight.
  5. Place jars in canner. Process for 10 minutes. Remove, cool and store.

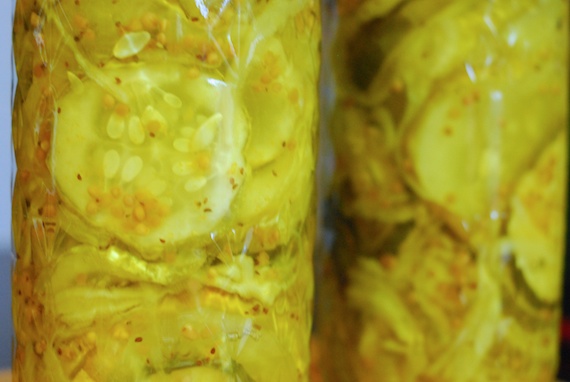
There were some pickles which didn’t make it in the jars, which I ended up eating HAPPILY. They were delicious! I’m excited to taste the gingery one. I’ll let you know how it comes out.