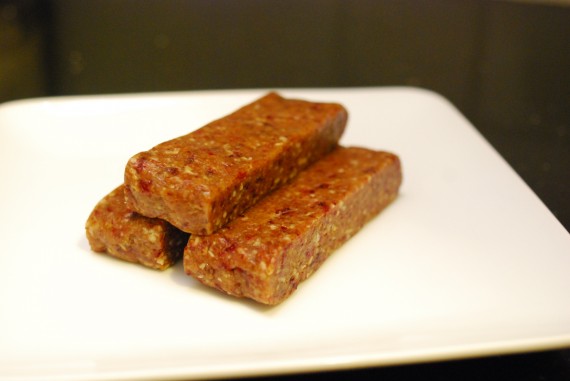
Alexäbars: Homemade Laräbars

I was famished and running late for a meeting the other day, so I ducked into a health food store for a snack. My go-to on-the-go snacks are Laräbars since they are all natural, delicious and filling. I grabbed an “Apple Pie” Laräbar; the ingredients are dates, almonds, apples, walnuts, raisins, and cinnamon. That’s it–no preservatives or flavorings! It was then I had an epiphany: Laräbars are really just Sephardic Charoset, the traditional apple and date spread eaten on Passover to symbolize mortar used to build the pyramids. And it was then I had my second epiphany: I can make this at home! The next day the experimentation began…

Homemade Alexäbars

  • 15 dried, pitted dates
  • 1/2 cup almond meal
  • 1/2 cup dried cranberries
  • 1/2 cup raw sunflower seeds
  • 1/2 teaspoon ground cinnimon
  • Pinch of salt
  1. Put all ingredients into the bowl of a sturdy food processor and pulse until blended well; the mixture should be able to stick together in a ball if you take a bit and roll in your hands.
  2. Line a small baking sheet or pie tin with parchment and place date/nut mixture on it, with another piece of parchment on top. Smooth out the mixture with a rolling pin or the back of a large spoon. Place in refrigerator for 30 minutes.
  3. Remove from refrigerator, and peel of the top layer of parchment. Cut into desired shape. Wrap individual bars in plastic wrap and store in fridge.

This was the first batch, and it was surprisingly easy, as long as you have a sturdy food processor. For my next batch, I plan to up the seasonings, maybe adding more cinnamon or cardamom. Now, the next time I’m running late for a meeting, I’ll reach into my bag for an Alexäbar!

Chocolate Almond Anise Biscotti

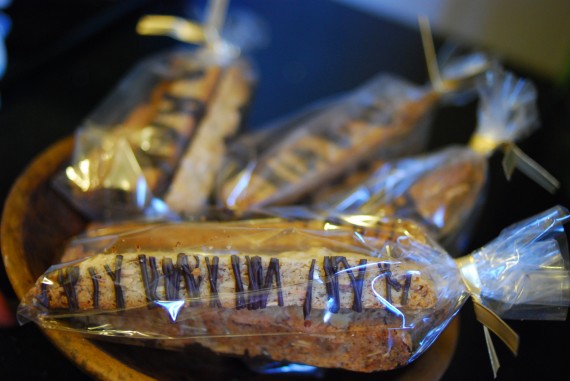
Happy (belated) mother’s day! For most holidays, I like to get my creativity on and make things as gifts. This year, I made the mothers in my life these crunchy, nutty vegan almond anise biscotti. In an ideal world would have I posted this recipe before mother’s day… but I didn’t, however there are always occasions to bake, right?! I modified the recipe from Veganomicon, which is a wonderful comprehensive book and a great rescource for desserts. I changed the oil to walnut oil, substituted almond meal for some of the flour, and the biscotti in the book didn’t have chocolate on them, but I thought, hey–what ISN’T better with chocolate?!

Almond Anise Biscotti

  • 1/3 cup almond milk
  • 2 tablespoons ground flax seeds
  • 3/4 cup sugar
  • 1/2 cup walnut oil
  • 1/2 teaspoon vanilla extract
  • 1/2 teaspoon almond extract
  • 1 1/2 cup all purpose flour
  • 1/3 cup ground almonds (almond meal)
  • 2 tablespoons arrowroot powder
  • 2 teaspoons baking powder
  • 1 tablespoon anise seeds (or less, but I love the flavor)
  • 1/2 teaspoon salt
  • 1 cup slivered raw almonds
  1. Preaheat oven to 350F. Line a cookie sheet with parchment.
  2. In a bowl, mix together flour, almond meal, salt, anise seeds, arrowroot and baking powder. Set aside.
  3. In a large bowl, whisk together the almond milk and flax seeds for a few seconds. Then whisk in sugar, oil, and extracts until smooth. Add dry ingredients little by little until a dough forms. If it’s too sticky, add a little more flour. Then, add almonds.
  4. Split the dough into 2 halves, and form each piece into a rectangle on the baking sheet. Try to squish the sides in so it isn’t flat. They will expand when cooking, so try to not have them touch. Bake for 30-35 minutes, until puffy on top and golden on the edges.
  5. Remove and put on cooling rack for a few minutes. Then slice with a long serrated knife, cut in one fell swoop, and be careful that the pieces don’t crumble. I cut them on the bias, which leaves long, elegant biscotti.
  6. Arrange cut biscotti in a single layer on the baking sheet. Cook again (biscotti means “twice cooked”) for 10-15 minutes, until brown and crisp. If you prefer, cook for 5 minutes, then turn off the oven with biscotti inside for 30 minutes.
  7. Transfer to a cooling rack and cool completely. Store in airtight container.

Chocolate drizzle:

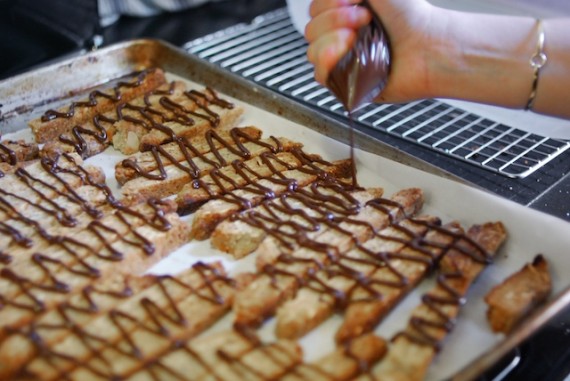
Melt about 1/2 – 3/4 cup of dark chocolate in the microwave or in a double boiler. Put melted chocolate in a small ziploc bag, and cut off a tiny piece of the corner. Squeeze bag as you zig-zag the chocolate drizzle on the biscotti. You don’t have to do one at a time–you can see in the pic above, I did 2 or 3 at a time. Once drizzled with desired amount of chocolate, put sheet pan into freezer to set chocolate. To gift, wrap 3-4 biscotti in a plastic treat bag, or reuse a nice tall glass jar.

Grilled Polenta with Mushrooms

Another day, another barbecue! With the days getting longer and the weather getting warmer, we’ve really enjoyed making our meals outside. We had a delicious barbecue at a friend’s house on Sunday, and as a starter, we made this grilled polenta dish. We use a lot of polenta in our house, as cornmeal is a hearty whole grain pantry staple, but we rarely use pre-cooked, rolled polenta, since it’s so easy to cook cornmeal into polenta (see this recipe); however this is a great time to use the pre-cooked since it’s easy to just buy, slice and grill.

Grilled Polenta with Mushrooms

  • 1 roll pre-made polenta (look for good quality polenta with few ingredients)
  • 2 cups shitake mushroom caps, diced
  • 2 cloves garlic, chopped
  • Olive oil
  • Fresh herbs (I used thyme and chives)
  • Balsamic vinegar, reduced*
  • Salad greens
  • Salt, pepper

  1. Preheat the grill on high. Cut the polenta log into inch-wide round slices.
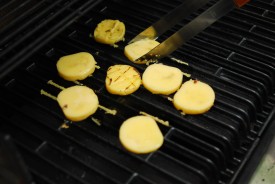
  2. Grill polenta about 3 minutes per side. No need to oil the slices–the slices we oiled actually stuck more than the non-oiled slices.
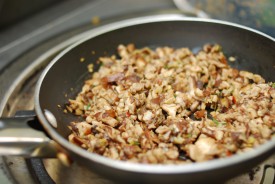
  3. Separately, heat some olive oil in a sauté pan, and add garlic; cook for a few moments. Add chopped mushrooms, thyme, salt and pepper. Cook over medium heat for 8-10 minutes, until mushrooms soften up.
  4. Toss salad greens with oil, vinegar, and season with salt and pepper.
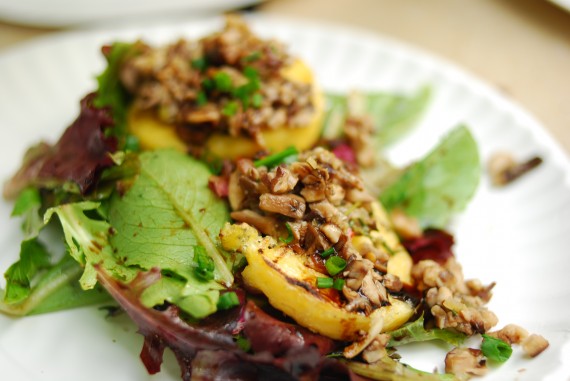
  5. Plate with greens on the bottom, then grilled polenta slices, and top with mushroom mixture. Garnish with chopped chives, and drizzle with reduced balsamic vinegar.

This recipe can be modified with other vegetable sautées, such as cherry tomatoes and basil, or zucchini and red onion, or garbanzo beans and cumin. What other toppings do you think would be good with grilled polenta?

*Reduced balsamic vinegar is a sweet, syrupy, glorious thing. To make reduced balsamic vinegar, pour 1/2 cup of good quality (caramel color should NOT be in the ingredients!) balsamic vinegar in a small sauce pan and bring to a simmer. Simmer for 10-15 minutes, until it reduces and becomes syrupy. Keep watch over the boiling vinegar, as it can burn easily. Store in a squeeze bottle to drizzle over grilled vegetables, pasta and sandwiches.

Grilled Pizza

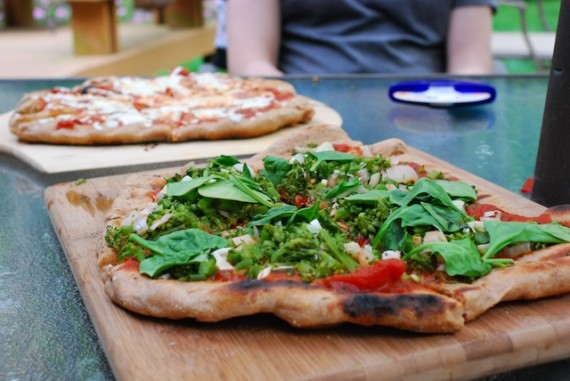
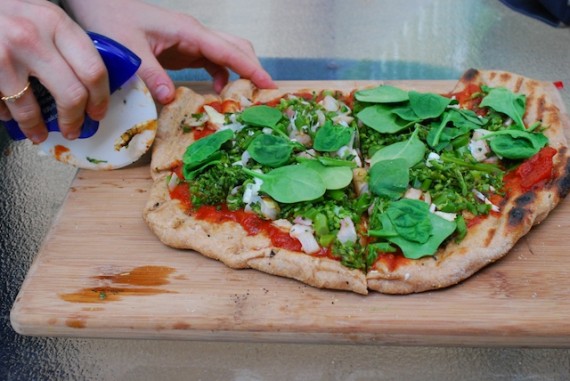
Well, it’s that time of year again–BBQ TIME! But what do you do if you’re vegetarian or vegan and you’re going to a barbecue or if you aren’t but you’re hosting a vegetarian or vegan at your barbecue? Grilled pizzas, of course! This is a really easy recipe that is definitely a crowd pleaser. You can buy already-made pizza dough at most supermarkets, but it’s very easy to make yourself (see this previous post for Matthew’s pizza dough recipe).

Grilled Pizza

  • 1 recipe pizza dough
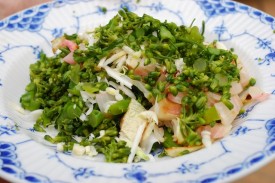
  • Chopped vegetables for toppings (pre-roasted vegetables are my favorite; on this pie I used a combo of grilled onion, steamed brocollini, baby spinach, and spring garlic)
  • Tomato sauce (reasonable use for canned sauce here–doesn’t have to be “pizza sauce”, any tomato sauce will do)
  • Cheese (Mozzarella and feta work well, optional)
  • Cornmeal (you can use flour if you don’t have cornmeal),
  • Olive oil

  1. Heat grill on high.
  2. Dust a large wooden cutting board or a pizza peel with cornmeal.  Push down dough into pizza-shaped pies of any size.
  3. Brush the top with olive oil, and flip pizza onto grill, olive oil side down.
  4. Close grill and cook for 3-5 minutes, until crisp and browned on bottom. Brush top with olive oil and flip pizza.
  5. Top with tomato sauce and toppings of choice.  Cook another 3 minutes, until the bottom is crunchy and the toppings are heated through or melted.

The pizza was a success–with even the non-vegetarians enjoying the cheese-less pizza! Happy grilling everyone!

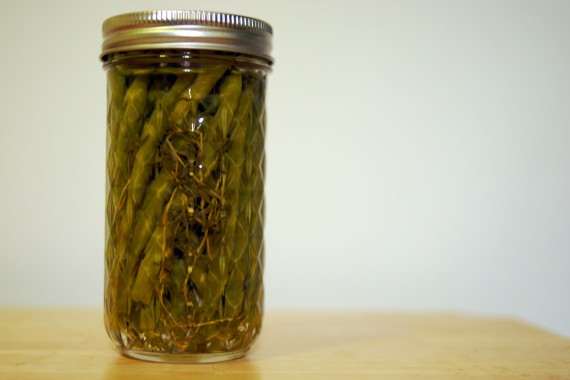
Thyme for Pickled Beans

Aye dios mio! It’s been a sprint of a month–and sadly, another without a post!! I’ve been busy: working on my CSA‘s membership drive, helping to organize the Queens Green Alliance’s Earth Day Fair, and building up my acupuncture practice. But don’t think that just because I’m busy, I haven’t been cooking! To the contrary, I have been cooking up a storm (easy with my stocked pantry) but have yet to get back in the groove of posting my kitchen creations. In the next few weeks I’d like to retroactively post some recipes I’ve been eating a lot lately (hello red quinoa/black bean and feta salad, I love you), but for now, I am reporting on my April Tigress Can Jam creation.

I was very excited to find out that this month’s theme was herbs. Herbs are a great way to celebrate Spring, as their delicate, green, aromatic essence wakes up the palate, reflecting all the blooming that is happening outside.  I love the earthiness of thyme, which I often use when roasting vegetables.  So this was my experiment to see how thyme would work with fresh pickled green beans.  I modified the Ball Complete Book of Home Preserving recipe for Dilled Beans, and came up with this simple, pretty jar. If you are new to canning, I recommend only using recipes from published books.

Thyme for Pickled Beans

Recipe yields one 12 oz jar

  • String beans – enough to fit into 1 jar – washed and trimmed
  • 3/4 cup white distilled vinegar
  • 3/4 cup water
  • 1 T pickling/canning salt
  • 3 whole black peppercorns
  • 1 clove garlic, sliced
  • 3-6 sprigs of fresh thyme
  1. Prepare canner, jars and lids. If you are new to canning, read THIS primer from Tigress.
  2. Bring vinegar, water and salt to a boil over medium heat; add beans, garlic and thyme. When boiling again, turn off heat.
  3. Pack beans and thyme vertically in jar. Ladle in hot pickling liquid, leaving 1/2 inch headspace. Remove air bubbles, and adjust liquid levels as needed.
  4. Wipe rim, center lids, screw on band, and process in boiling water for 10 minutes.

As I only have one jar, I’m going to wait to open it for a special occasion–maybe an upcoming picnic, and I’ll report back to let you know how they came out. Until then, they will sit in my pantry until the thyme is right…

5/2: We ate the beans at a barbecue with friends, and they were delicious! The thyme flavor really came through, and they were a great snack while the grill was heating.