Sesame Green Beans

ACS_0090

You know those addictive sweet, sesame Chinese restaurant “dried green beans”? Well, these are them but better, not fried and so, so easy.

This season’s Golden Earthworm CSA has delivered week after week of tender, organic green beans. Honestly, I’ve mostly been snacking on them raw but last week we received 2 bags of them and I decided to branch out and try my hand at re-creating those addictive, Chinese green beans at home. Well, let me tell you they were so easy and the final result was very true to the beans I was craving.

Sesame Green Beans

  • Green beans, washed and trimmed
  • Freshly grated ginger
  • Minced garlic
  • Tamari
  • Mirin
  • Sesame oil
  • Sesame seeds
  • EVOO
  1. Preheat oven to 400F
  2. Toss green beans with EVOO and place on a parchment-lined sheet pan; season with salt. Roast.
  3. Meanwhile, mix ginger, garlic, tamari, mirin, sesame oil. I used about 1T grated ginger, 2 small garlic cloves, 1T tamari, 2t mirin and 1t sesame oil, but you may want it less gingery or sweeter (up mirin for sweetness).
  4. When green beans are bright green and slightly wrinkled, pull the pan out and toss the green beans in the bowl with the sesame mixture. Place green beans back on the sheet pan, sprinkle with sesame seeds and roast for another 10 minutes or until they look caramelized.
  5. Try not to eat them all at once.

ACS_0091 (1)


Kitchen Status Day 1, Phase 1.

Well, first things first, about 2 hours after yesterday’s post I considered deleting and halting the #kosher5779 experiment because — what was I thinking?! So, that’s where I am today, day 1.

But after a deep breath, I realized I’m legitimately interested in what this process will be like. I’m curious about what I will learn and explore along the journey, but I’m also interested to see if I will exist differently in my kitchen and experience cooking, or myself, in a new way. I’m used to having other self-imposed constraints on my diet/cooking (like when I’m plant-based), but will this be different? I just don’t know and I’m curious enough to move forward (until my next “what am I thinking” moment).

So what’s the kosher status of my kitchen right now?

  1. I don’t cook shellfish or pork at home. Not that I haven’t ever, but I don’t currently as of probably 8 years ago.
  2. I don’t cook or serve milk and meat together however we do use the same pans, utensils, plates, cutlery, etc to prepare and eat both milk and meat.
  3. We keep kosher for Passover, but don’t do a full chametz (bread, etc) clean out pre-passover.
  4. That’s it.

A few weeks ago I did a cursory google search and came up with this article on Chabad.org. While I don’t generally look to Chabad as my authority about anything, I jived with the first line in the article, “I’m beginning to consider keeping a kosher home, but the leap seems too daunting to do all at once.” The suggestion was to divide the task into 3 phases, the first of which is to only buy kosher meat and stop eating milk and meat together.

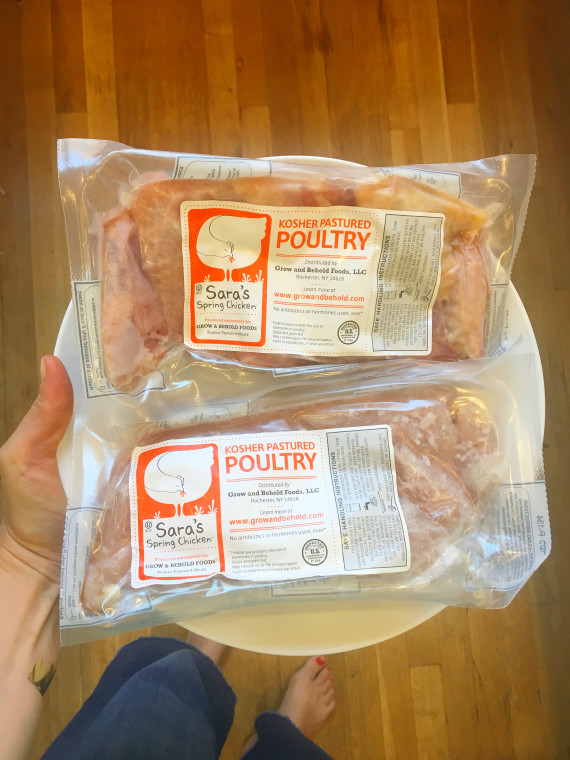
I can deal with that as a start! We don’t eat that much meat as it is, but for the meat we do buy (and eat) and eat at home, 90% is from Grow & Behold (the other 10% of meat I buy from the Forest Hills Greenmarket or from Whole Foods). I choose Grow & Behold for many reasons and honestly, until now the least of all was that it was kosher! The meat and chicken happens to be delicious, it’s a small, local, family-run company (started by people I know), they sell pasture-raised, local, humane meat and they deliver right to my apartment (more about them here, and if you want 15% off your first order use this code). But, did I say it was delicious? Because it is, and this only buying kosher meat thing isn’t going to be hard at all with a freezer already stocked with Grow & Behold meat. And since I already don’t eat milk and meat together at home: voila, phase 1 complete!

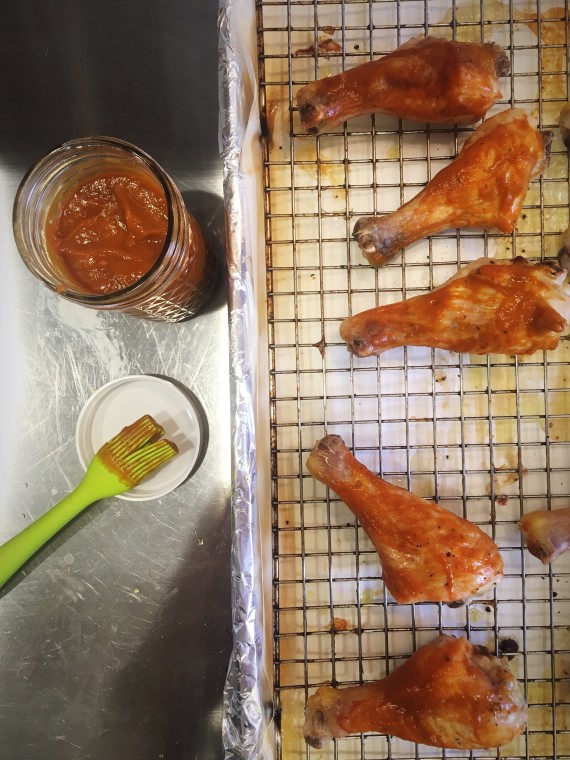
OK, I feel accomplished! Reminder, I’m going sloooooowwwww. So for today, I took out some G&B chicken to defrost in the fridge for shabbat and I’ll figure out what’s next later.

image

#Kosher5779

ACS_0065

I’m embarking on a personal journey and I’m going to bring you along for the ride. Over the next year, I’ll be kashering my apartment’s kitchen and exploring what it takes, what it means and how I feel throughout the process.

Why? Honestly, I’m not even sure. I’ve been thinking about it for a while though and if not now, when? I’m hoping that through the process of investigating, learning and cooking, a bit of the “why” will slowly (or maybe all at once) reveal itself.

It may not be obvious from the sporadic posts on this blog, but I cook everyday. My meditation space is the kitchen. It’s where I lose myself, process my day and explore. I figured why not bring tradition into my most personal, spiritual domain: the kitchen? What will it feel like? How will things change or stay the same? How will this impact my life? My family’s lives? Will I find meaning and connection? I don’t know, but I look forward to finding out.

I gave myself a full year because it’s complicated! I don’t want to rush anything and want to be super mindful about the process. I plan to read books, articles and source material about kosher guidelines from all perspectives. I plan to talk to people who keep kosher in all sorts of ways. Much of this is super-personal but if anyone is willing, I want to visit and cook in kosher kitchens. I already have a lot of questions and I want to use this blog as a way to document what questions I’m asking, what answers I’m coming up with and what it all means. I want to give this project a full year to allow the idea juuuuussst germinating now the space to grow. I don’t know where I’ll ultimately land but I’m really interested in embracing the process with an open & curious heart, mind and kitchen.

Elul, the last month of the Jewish calendar begins this weekend which means Rosh Hashanah (the Jewish New Year) is just around the corner. The year 5779 is approaching and here… I… go!

ACS_0064

Transform those CSA greens into this!

IMG_0985It’s the most wonderful time of the year – Our CSA started a few weeks ago! This is our 10th season with Tuv Ha’aretz Forest Hills CSA, and every Tuesday through the end of November, we pick up veggies from Golden Earthworm Organic Farm at the Forest Hills Jewish Center. Over the past decade, we’ve gotten to know and absolutely love the farm, the farmers and have become accustomed to the arc of the local growing season. In the beginning of each season there are greens… TOOOOONS of greens! Everything from heads of buttery butter and red leaf lettuce to freshly-picked red kale to bags of mustard green salad mix to baby arugula to glorious small roots like turnips and French breakfast radishes with their tender leaves still attached. The challenge during this dawning of the season is finding recipes and uses for all those ample greens so they end up in your body and not in the compost.

IMG_0910Enter Vefa’s Kitchen. I’ve written before (warning: old blog post & bad pics!) about my love for this simple, vegggie-forward Greek cookbook and it’s definitely one of my favorites to turn to in the beginning, green-heavy portion of our CSA season. Over the years I’ve made many versions of greens pies (it’s not just for spinach anymore!) – sometimes with bulkier homemade crusts, sometimes with cornmeal crusts and this time I wanted to try this elegant spiral filo preparation. The recipe in the book was for eggplant pie, but I wanted to apply it to all the greens in the share (and some stragglers in my fridge from Trader Joe’s). I also had the idea to take the whole thing in a veganized spanakopita direction by using tofu instead of feta cheese.

My son recently turned 4 and he has been taking on more and more responsibility in the kitchen. It’s been amazing to witness him get more confident with his knife and with cracking eggs and stirring pots. Tofu is one of his favorite things to cut since it’s soft enough that he can work on and improve his knife skills! Kids can be very detail-oriented and he likes to try to make the dice all the same size (and he also likes to snack on the chopped tofu). For the record, he keeps a very clean workstation.

ACS_0015

For the rest of the filling I sauteed onions and garlic and then added alllll the washed and chopped greens in the fridge.  I used organic Tuscan kale from Trader Joe’s plus the Golden Earthworm FAR SUPERIOR kale and I also threw in the radish and turnip tops since I wasn’t going to use them for much else. Once the greens wilted with the onions and garlic I added diced tofu, balsamic vinegar, lemon zest and lemon juice, salt, pepper, fresh mint and toasted sliced almonds. I kept the filling in the fridge overnight so it was cool enough to work with, and also to encourage the melding of flavors.

ACS_0014

When ready to roll, I took out the filo dough from the freezer to thaw and preheated the oven to 350F. Filo is pretty forgiving (as far as paper-thin, delicate sheets of dough are concerned) and as long as you have olive oil (or melted butter if you want to go dairy), you can mend the cracks and tears in the dough as they happen when you roll up the pie.

For these cute little schneckens (German for little snails) I started with a vertical piece of filo, brushed with oil and folded down over itself. Then I added the filling towards the bottom, rolled up and then scrunched it into a spiral and placed onto a sheet pan. When they were all done and brushed with a bit more oil, I baked until slightly browned, which was 35ish minutes. We ended up eating this for a couple days and Matthew took for lunch one day and they held up to transport and reheating in an office microwave.

Do you think you’ll make this with the greens your getting from CSA? If you do, please tag #sustainablepantry in your post!

Vegan Greens Pie

  • 1 box filo dough
  • All the greens in your kitchen, washed and chopped including any fresh herbs you have
  • 1 package firm tofu, drained and diced
  • Zest and juice from one lemon
  • Onion, chopped
  • Garlic, diced
  • Balsamic vinegar
  • Nuts of choice (can omit), toasted in a dry pan
  • Salt, pepper, olive oil
  1. Saute onion and garlic in oil until soft, then add greens and saute until wilted.
  2. Add in diced tofu, balsamic, lemon juice and zest, herbs and season with salt and pepper to taste. Filling can be made ahead of time and stored up to 4 days in the fridge.
  3. When ready to proceed, thaw filo dough and preheat oven to 350F.
  4. Prepare a work station with a small bowl of olive oil and a pastry brush. Line a sheetpan with parchment. When you take a piece of filo to work with, cover the remaining sheets with a barely moistened kitchen towel. Place a piece of filo vertically on your work surface, and brush liberally with oil, then fold down and brush again.
  5. Taste the filling, as you might want to reseason with salt or lemon juice. Transfer some filling to the bottom edge of the filo dough and roll up from the bottom, brushing with oil as you roll. It might tear, but just brush with oil and keep on rolling.
  6. Once it’s rolled into a log, brush the top with oil and roll into a spiral. I found this easiest by holding the whole thing in my hands and encouraging the spiral shape off the board. When spiraled up, transfer to the sheet pan.
  7. Continue with remaining filo and filling. Before baking, brush the top with oil again.
  8. Bake for 30-40 minutes, or until golden brown.

Veggie-Based (& Sugar-Free!) Roasting Sauce

Finished dinner

I came up with this idea while out on a run in the days before I was hosting a small dinner party. I wanted to make chicken wings for us to nosh on while cocktailing, buuuuut I wanted to avoid any added sugar. And I didn’t want to merely turn to my usual sugar subs (maple syrup or honey), I wanted to really challenge myself to think it through… Is it possible to get a sticky, sweet, finger-lickin’ sauce without adding sugar? The answer is yes! I ended up using a combo of high-sugar veggies plus some dried fruit – most likely inspired by a big batch of mole I made a few weeks ago which uses raisins and dried chilis to get it’s distinctly sweet-spicy profile. The wings ended up so great (and we had so much fun) that I don’t even have any pics of from that night! So last night I used the leftover sauce to make mid-week roasted chicken legs into a real treat. This recipe makes 1.5-2 cups and should keep in the fridge for 3ish weeks.

Basting

Sugar-Free Roasting Sauce

  • 1 onion, diced
  • 2 cloves garlic
  • 1-2 Tablespoons grated ginger
  • 2 carrots, peeled and cut into small chunks
  • 4 dried apricots, sliced
  • 1 Tablespoon tamari
  • 1-2 Tablespoons rice wine vinegar
  • 1 dried chili, I used Morita (you can sub a dried Chipotle, which would add even more smokiness). Toast the chili a cast iron pan for a minute or so, then remove seeds/stem & place in a bowl with a splash of water, cover & allow to steam.
  • 1-2 anchovies (can sub miso paste to make the sauce vegan)
  • 1-2 Tablespoons tomato paste
  • Sesame oil
  1. I used an InstantPot, but you can also do this first step on the stove top instead. Put the onion, garlic, ginger, chili, apricot, tamari, rice wine vinegar and 1 cup water in InstantPot and set to 3 minutes on high pressure. Use manual release.
  2. Transfer to high powered blender and add anchovies/miso paste, tomato paste and pulse until blended. Then while running on high, add sesame oil little by little (up to 3 Tablespoons). Thin with water, 1 teaspoon at a time. Taste and add salt, pepper, more acid as needed. I like everything tangy, so if there’s too much vinegar in this – feel free to add more water or another apricot to balance it out.

roasted legs