Welcome Summer with Vegan Cashew Pesto

cashew pesto 2

Whether it’s wafting over from your garden (oh I wish I had a garden!), or from your CSA box (in my case…), or even from your grocery store (when all else fails!) – I’m sure we can all agree that the sweet scent of fresh basil is THE smell of summer. Although basil can be used in so many ways, from topping off a summer sandwich, to muddling it into a favorite cocktail, to kicking up a simple stir-fry, pesto sauce is really basil’s time to shine. Classic pesto is made from just five ingredients: basil, garlic, extra virgin olive oil, pine nuts and parmigiano reggiano cheese (often seasoned with 2 extra ingredients, The S&P500, as Matthew calls salt and freshly cracked black pepper).  And while pesto classico is definitely delicious, I’ve found that this vegan version, which relies of soaked cashews in lieu of the parmigiano cheese is a great alternative if you are avoiding dairy. I’ve used this spread on grilled pizza, on sandwiches, and when I’m feeling particularly fancy, on slices of zucchini crostini for a gluten-free hors d’oeuvres.

cashew pesto

This cashew pesto is such an easy spread, which can be whipped up in no time and modified to be more creamy or garlicky or basil-y depending on your mood (or what’s stocked in your kitchen). I add a squeeze of lemon for a touch of acid and a dab of miso to round it out with umami richness. If you don’t have miso in your fridge, feel free to add a dash of tamari or soy sauce – it won’t be exactly the same, but you will get a similar umami-ness.

cashew pesto 5

To begin, soak the cashews. I never measure anything, I just fill a small jar or bowl with raw cashews and cover with just boiled water. I soak them for as long as I have time – sometimes it’s only 10 minutes, and sometimes it’s overnight. Yes, the resultant pesto is creamier when you soak them longer, but it’s still super-tasty when you do a quick soak. In other words, don’t be held back from making this recipe if you only have a few minutes to soak.

cashew pesto 7

Once the soaking time is up, drain and add the cashews, a handful of fresh basil, a clove of garlic, a scant teaspoon of miso paste, the juice of half a lemon and blend in a food processor until coarsely chopped. Scrape down the sides of the food processor, and start blending again, adding olive oil in a stream while blending to create an emulsion. Once the sauce has become the consistency you’d like, taste and season with salt and pepper. The spread keeps well in the fridge for up to a week.

cashew pesto 4


I LAvocado You.

avocado 2

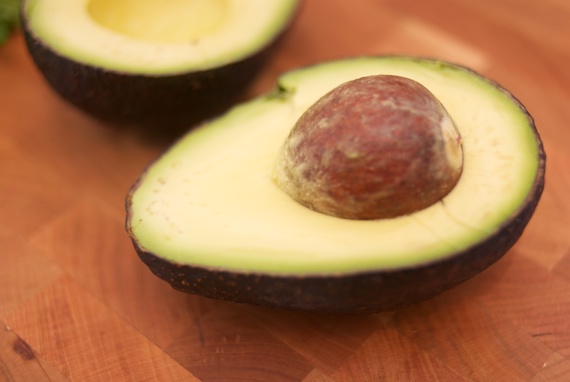
I used to be terrified of avocados and coconuts. A child of the early nineties, I was raised during the peak of the “all-fat-is-bad-fat” phase epitomized by low-fat Snackwell’s cookies. It was only in the past few years, truly, that I’ve been able to fully embrace these plant fats without feeling guilty, and I now I’m sure to eat plenty of plant-based fats throughout the day. Nothing says plant-based-good-fat like avocado, with it’s pale, creamy, rich flesh, and now that I’m 100% in the #teamavocado camp, it seems that there’s no place avocado hasn’t creeped in to my cooking. From a traditional Chinese medicine perspective, avocado is sweet, cooling and moistening. This might explain why my mother once saw a man on the subway open an avocado and methodically rub the flesh onto his face over the course of her trip downtown. Everyone loves avocados…even in their purest form…even on their face! While I don’t — or should I say haven’t YET – enjoyed avocado directly on my skin, I often do enjoy the sweet, nourishing fruit simply. Here are some ideas to get you out of the guacamole rut. Not that there’s anything wrong with guacamole and in terms of ruts it’s probably the best one to be in, but there’s so much that’s right with other preparations of avocados that it just wouldn’t be good to keep it all to myself.

avocado toast

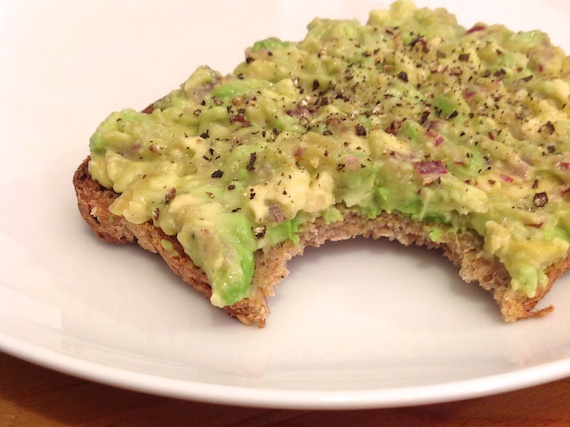
Sometimes I do nothing more than mash ripe avocado up with whatever herbs I have on hand, salt and fresh black pepper, olive oil, a bit of chopped shallot and/or garlic and throw it all on some bread. Voila, avocado toast! It’s a great snack, or light meal when paired with a salad or bowl of soup. It’s filling, and you can riff on this base in a bunch of different directions: cumin and sliced tomato to add a south-western flair, ginger and sesame oil for an asian avocado spread, or tarragon and olives for a Provencal twist.

avocado

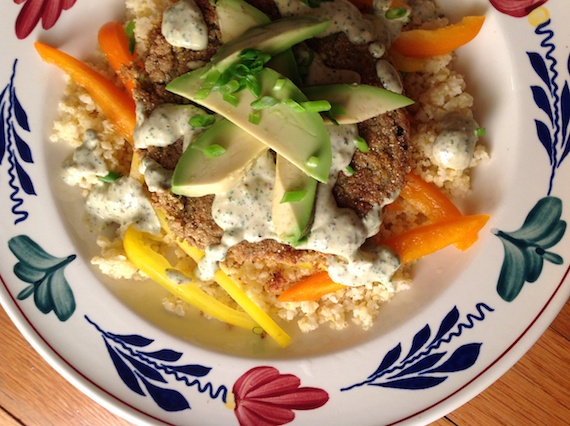
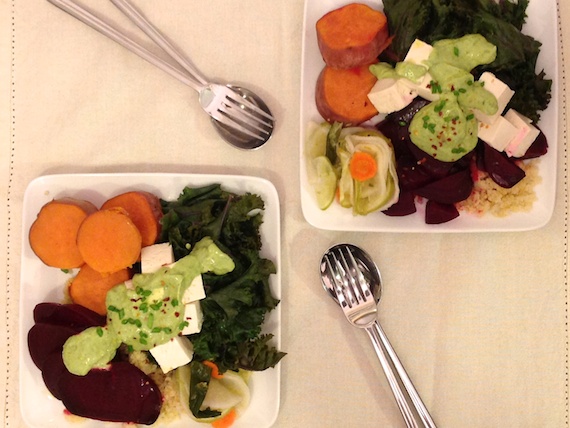
Other times, avocado works as a nice, rich garnish when merely sliced atop a plate of food. In the case of the meal above, warm millet and a spiced lentil/tofu patty was topped with sweet, cooling avocado and slightly bitter dandelion-green tahini. All together, the meal delivered a balanced flavor profile which, without the avocado, might have been a too harsh with the spicy patty and all. The next time you feel like your dish needs a little creamy love, throw on some thinly sliced avocado and marvel and what just a little of this magic fruit does to your plate and palate.

avocado dressing 2 avocado dressing

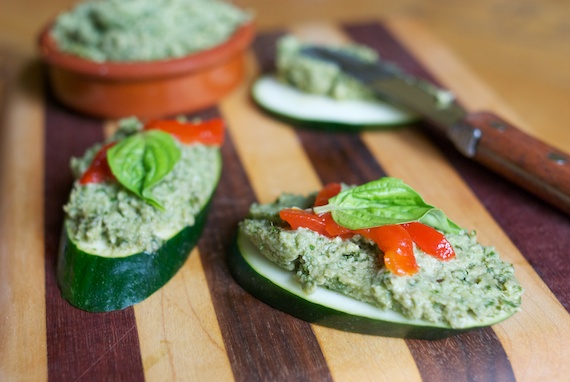
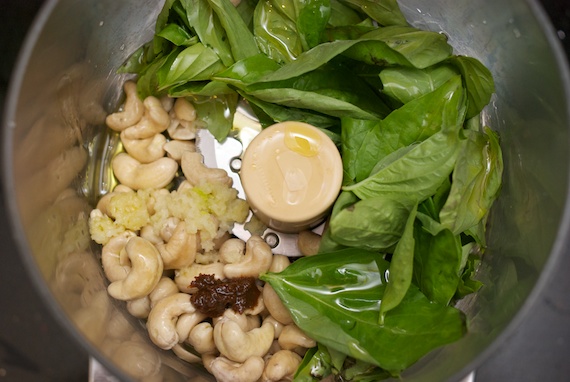
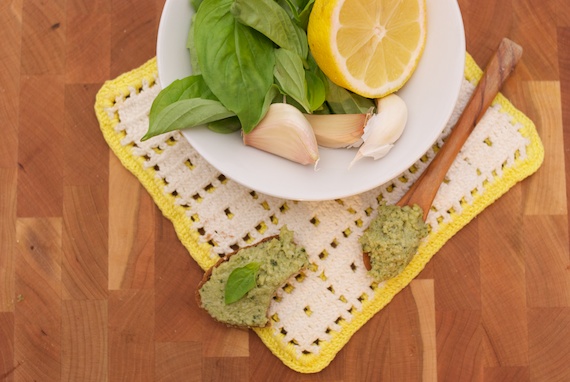
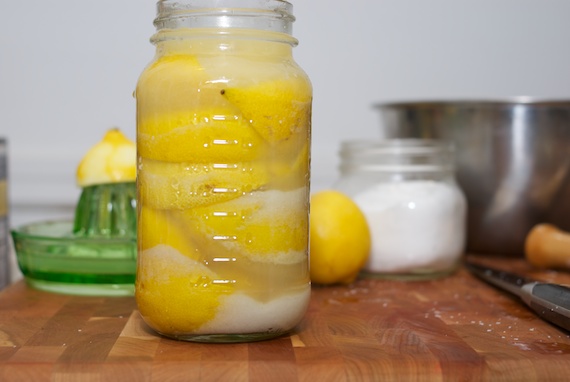
Lately, I’ve been experimenting with a creamy avocado dressing that I use over steamed vegetables, as a dip for crudité, or as a spread on sandwiches. In the Sustainable Pantry style, I use in whatever is around like herbs, garlic, and often preserved lemon, in addition to lemon juice or rice wine vinegar and olive oil. Into a large jar everything goes, along with some water, and I blend with an immersion blender. Once the sauce is smooth, it stores for a few days covered in the fridge, and can be thinned out with a drop of water or lemon juice if it thickens up in the fridge. It’s kinda like vegan mayo, and not to sound too hippy or anything, but it is delicious on a tempeh sandwich. Groovy, man!

avocado (2)

But here’s the thing that’s gonna blow your mind: YOU CAN HAVE AVOCADO FOR DESSERT! I was introduced to this delicious, vegan chocolate avocado pudding at my friend Melani’s house last summer, and I’ve been making it ever since. The pudding is “raw” so you don’t have to turn on the stove and schvitz over milk to make a custard base, which is a major plus in this heat – oy vey! The chocolate comes from raw cacao powder, which is so chock-full of antioxidants that eating this avocado pudding is basically the same as taking a multivitamin. To sweeten it up, you can use either maple syrup or soaked, pitted dates which I prefer. Once made, the pudding lasts a week to 10 days in the fridge, but I highly doubt it will keep that long!

avocado 7

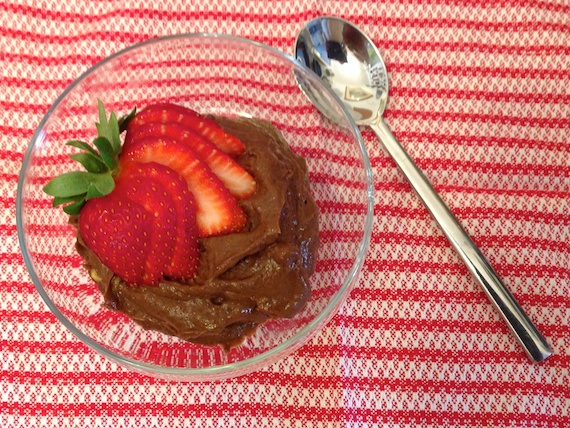
The ratio I use is 1 ripe avocado, 1/4 cup cacao powder, one tablespoon ground vanilla (you can use a bit less vanilla extract if you don’t have ground vanilla), maple syrup/soaked dates to taste, and a pinch of salt. This all goes into a Cuisinart/food processor, and is blended up until smooth. I usually use about 6-7 dates per avocado, soaked in just enough hot water to cover for a couple of minutes, then drained and added into the blended (reserve this sweetened water to thin the pudding if needed). One addition I’ve made to Melani’s original is to add a bit of coconut milk – about 1/4 cup or so, which makes it oh so creamy, and oh so good-fatty, and oh so delicious. Top with berries, or shredded coconut, or just eat from the food processor with a spoon, as is my custom.

A few more avocado tips:

  • Store unripe avocados out on the countertop until the hard, rough skin darkens and thins, and the flesh becomes soft. At this point, store in the refrigerator until used. 
  • When opening an avocado, half it and use the non-pit side first; the side with the pit still in keep stay longer. Spritz some lemon juice on the open surface, which helps prevent oxidation – the browning of the avocado flesh from exposure to air, and wrap in plastic wrap in the refrigerator.
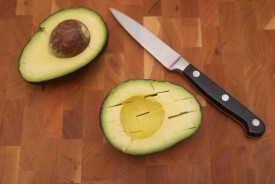
  • To open and pit an avocado, cut around the large pit lengthwise and twist the avocado open. Hit the heel of your knife into the pit, then twist the knife so the pit comes out of the avocado and remains on your knife. Then, hit the knife on a cutting board with the heel/pit hanging off the side, and the pit will come right off the knife (have your hand or a garbage under the pit to catch it – these things are pretty slippery.)

What do you do with avocados?

Taste of Queens 2013

Last Tuesday was the 11th annual Taste of Queens event, a night of delicious food and drinks hosted by the Queens Economic Development Corporation at Citi Field. There were over 900 people sampling all sorts of treats from 40 local Queens-based restaurants, bars and food companies. I was excited to see some familiar faces from other QEDC events and last year’s Taste of Queens, but I was even more thrilled to see (and sample!) new flavors. Native Coffee Roasters was one of these newbies.

Native Coffee

By now you all know how much I love Queens, but do you know how much I love coffee? I’m not a drink-coffee-all-day-kinda person, and I’m not a snob about it, I just LOOOOVVEEE coffee. The taste, the ritual, the scent of its brewing, I love it all. I drink my 2 cups of joe in the morning, black, and then I’m good to go. This recent New York Times article discusses all the current trends happening in the NYC coffee scene these days, but at home we brew our coffee from an out-of-fashion and simple percolator. It’s old, but I love it, and it does the trick. We buy our coffee from Fairway – usually the fair trade medium or dark roast, and we are happy.

QEDC 3QEDC 1

However, up until now there hasn’t been a Queens option. Enter Native Coffee Roasters, a new Astoria-based coffee company. Since the actual coffee bean can’t be sourced locally in the North East, having an option of locally roasted beans is the next best thing. Brian Donaldson, the owner of Native Coffee opened up in Astoria last year after wanting to add diversity in the NYC-based small-batch roasters. He’s committed to making a NYC product for NYC natives. I had been hearing great things about the coffee over the past few months on Twitter, but hadn’t had the chance to try it yet, so I was excited to see Brian sampling his coffee at Taste of Queens last week.

QEDC 2

Brian was serving pour-over coffee, which is a technique of (can you guess it?) pouring hot water over the ground beans that allows more of the subtleties of the coffee’s flavors to come through. Native Coffee offers a number of single-and blended coffees, and he was serving his Columbian coffee that night, which was so smooth and it paired really well with all the desserts I was sampling. Native Coffee also has a blend called NYC Diesel, which changes based on bean availability and seasonality. Native Coffee Roasters is available at the gift shop at Queens Country Farm Museum and should be rolling out into more stores and cafes in Queens soon. Definitely one to keep an eye out for. Queens + Coffee = LOCAL CAFFEINE!

QEDC

Photo Credit: Dominick Totino

I was also excited to see my friend/colleague Markella Los from GrowNYC at Taste of Queens, since it gives me the opportunity to tell you all about the awesomeness that’s happening in Forest Hills these days, which I trace back to the moment the Greenmarket opened. A few years ago, there was some community push-back when we tried to get a Greenmarket here, but last year after a successful petition campaign and the support of Markella (above right) and others at the GrowNYC office, the initiative passed unanimously in the community board, and the Greenmarket opened in the summer of 2012 on the corner of 70th road and Queens Blvd. It has been a smashing success, running longer than expected through the end of last year and re-opening earlier than planned in April.

QEDC 7

Each week, a great variety of local, sustainable vegetable, dairy, meat, and fish producers set up and sell their goods at the Greenmarket, and sometimes there are tastings and educational demos run by GrowNYC. And every week, there is a crowd of people chatting, buying food, exchanging recipe ideas, and meeting each other. In the past few months a number of new cafes, wine bars, and specialty food shops have opened in the FoHi area, which I think is directly related to the opening up of the Greenmarket. At Taste of Queens, GrowNYC was serving a fresh salad which was simple and delicious, and just my style. Check out where the closest GrowNYC Greenmarket is to where you live/work here.

QEDC (1)

Photo Credit: Dominick Totino

The event also honored the 3 winners of the QEDC’s StartUP! business plan competition, a opportunity for new or growing Queens-based companies to win $10,000 to jumpstart their business. This year’s winners were:

  • Food Category: Astoria Coffee, a soon-to-be coffee shop in Astoria, Queens which hopes to become a local go-t0 cafe featuring artisinal coffee, teas, poetry readings and more
  • Community Development Category: Fabulous Fitness, a fitness center in Springfield Gardens, Queens
  • Innovation Category: M3D Consulting, a “green” business management, policy consulting and project management company focusing on sustainability, in Flushing, Queens

All in all, it was a very delicious event, and I left with a full belly and beaming with Queens County pride. Kudos to the Queens Economic Development Corporation for nurturing local companies and creating an event to showcase all that is being cooked up in Queens.

Kicking Up The Pantry With Preserved Lemons

Preserved Lemons 8

Lemons + salt = sunshiney day.

Preserved Lemons 3

Preserved lemons are a relatively new addition to my pantry since my friend’s mother, Josiane, coached me through making my first batch last year. Josiane is Moroccan, and assured me they were easy to make, and essential to have on hand. How right she was! Once they were in my fridge, they made their way into a range of tasty recipes from dressings to salads to soups to marinades, just as Josi predicted. Their taste is kinda lemony, duh, but also SO much more. The salt brings out the umph in the lemon, while in some ways minimizing the acidity. One medium-sized jar lasted almost a full year, even though I did not shy away from putting the pungent slivered rinds into everything. And when I ran out, we were smack in the middle of wintery citrus season, and it seemed like a great time to put up another batch. The “recipe” doesn’t have any amounts, and Josi said that it’s really just salt and lemons; you’ll need a clean glass jar and sharp knife as well. Using organic lemons here is super-important since the only part you do eat is the rind, and non-organic lemons are sprayed with tons of waxes and sealants. Not tasty.

Preserved Lemons 5

First, wash the lemons. I mean, they are organic, but you don’t know who has touched them, right? Next, cut the lemons into connected-quarters, meaning don’t cut all the way through to the other side. It should look like a 4-petaled flower/lemon. Then, stuff about 1 tablespoon of salt into each lemon, doing your best to get it into each slice, and place the salted lemon in a clean jar. When you transfer the lemons to the jar, some of the salt will fall out and into the jar – it’s all good. Keep doing this with all the lemons, tamping down with a wooden spoon or your fingers. I use a muddler, which really gets the lemons crunched in there well. If you need to, you can cut some lemons in half (still with the extra quarter-slice), salt them, then squeeze them into the awkward corners of the jar to get the jar stuffed to capacity. The point is to fill every nook of available space with lemons, and get the lemons to release some of their juices so they are totally covered. If that doesn’t happen when the jar is filled with lemons, top it off with some freshly squeezed lemon juice.

Preserved Lemons 4 Preserved Lemons 6 Preserved Lemons 7

Once the lemons are all cozy in the jar and the level of juice is above the lemons, close the jar and leave it in a cool place for about 7-10 days. For the first few days, open the jar and re-tamp down on the lemons; you’ll see the lemons will let off a lot of juice over the first week, so it’s a good idea to put the jar over a plate in case the juice erupts, which happened to me! After a week or so, place the jar in the refrigerator, and wait another 2-3 weeks before you use them. You’ll know when the time is right – the lemon rinds become a bit translucent-seeming (I say seeming because they’re still completely opaque, they just seem translucent), and you’ll be able to cut through the rind with a fork.

Preserved Lemons 9

To use, take a quarter out of the jar, and remove the pulp, which will be easy-peasy, it just peels right off. Since 99% of the dishes that call for preserved lemon use only the rind, in general, I discard to pulp, rinse the rind, and julienne into strips or dice finely. (One fish tagine I made used both the rind and the pulp – what a lemony treat that was!) Where to use these umphy sunshine strips of preserved goodness? A great rule of thumb is to throw some in to any dish that you use lemon juice in, like salads, stews and dressings. I used preserved lemons in my chopped Israeli salads all last year, and it really freshened up the whole dish. I used some yesterday in an eggplant tomato stew and it imparted a lightness to the otherwise heavy meal.

Preserved Lemons 10 Preserved Lemons 11

I posed the question on our Facebook page: “What pantry staple do you keep on hand to kick up your dishes?” and I got great responses: anchovies, peanut butter, sesame oil, picked garlic, dulse flakes, and cumin.  Stay tuned for more in this series, and learn how to create some of these pantry staples, as well as fun, tasty ways to use them.

Tempeh Part II: Making Tempeh with Barry

Making Tempeh 6

This is Barry. He makes tasty, organic tempeh together with his business partner, Gordon. Although the website for Barry’s Tempeh is “growninbrooklyn.com”, the tempeh is actually made in Queens at The E-Space, a communal industrial kitchen in Long Island City. (You can read more about other exciting things going on at the Queens E-space kitchen here and here.) Barry, Gordon and their assistant Bessie, make tempeh every few weeks at the E-Space for a long afternoon/evening and I was fortunate to tag along with them for one shift last month. Barry is an interesting dude, and I loved talking with him and the rest of the Tempeh Team throughout the night. The process – soak beans, grind beans, cook beans, drain beans, mix in culture, bag tempeh, label tempeh – was repeated with each of the 3 versions of the commercial tempeh they sell in stores and markets around the city,  as well with a couple of experimental flavors that Barry was working with. All of Barry’s Tempeh flavors are vegan, two are gluten-free (soy/oat/barley has gluten), and the white bean/brown rice is both gluten- and soy-free, so there is something for everyone. Most importantly, all of their tempeh is delicious and made with the upmost respect for the ingredients.

And now, making tempeh: You start with beans.

Making Tempeh 14

Making Tempeh 17

Lots and lots and lots of beans that have been soaked overnight. Barry’s Tempeh uses both soy beans and white beans.

Making Tempeh 2 (2)

The beans are drained.

Making Tempeh 20

They they are ground with a huge meat grinder.

Making Tempeh 11

These are white beans.

Making Tempeh 2 (1) Making Tempeh (1)

The beans are then cooked in the biggest braiser you’ve ever seen. While the beans are cooked, the foam is skimmed off the top. I’ve mentioned before how much I love the zen of skimming, so I was thrilled to contribute to the tempeh-making process by skimming. And skimming and skimming. Once the beans cook for about 20-40 minutes (soy beans take longer to cook than white beans), the cooked beans are drained and placed into custom-made mesh bags which make it easier to squeeze out all the excess cooking water.

Making Tempeh (2) Making Tempeh 1 (1)


Making Tempeh 21

Meanwhile, oats, barley and brown rice are roasted. I wish this blog had smell-o-vision; the delicious roasting smell permeated the whole kitchen, even taking over the cookies being made in another part of the kitchen.

Making Tempeh 5

No, this is not a bag of ashes, it’s the starter culture. The culture is added to each batch of drained beans and mixed in with a large stand mixer. Large is an understatement. Humongous is an understatement. Here is Gordon mixing up a batch. Gordon is not a small guy, it’s that the mixer is HUGE.

Making Tempeh

Once the tempeh is mixed with the starter, it is weighed out and stuffed into perforated zip-lock bags (1 lb each). Once the bags are filled and labeled, they are placed on metal grates and eventually loaded into bread-proofer (I think that’s what it’s called) where the tempeh culture really does it’s thing on it’s overnight slumber. Barry likes to stay overnight and keep his eye on the tempeh. According to Gordon, Barry eats the tempeh the next day for breakfast. THAT’S quality control! For a recipe idea of what to do with Barry’s Tempeh, see Part I. For locations where you can buy Barry’s Tempeh, click here. And here is a great video highlighting Barry and the tempeh-making process by Liza de Guia at Food. Curated.

Making Tempeh 22Making Tempeh 13

Making Tempeh 2

Making Tempeh (3)

Barry was nice enough to give me my own little dose of starter so I can experiment with tempeh-making at home. My CSA’s bean share from Cayuga Pure Organics will be starting soon, so I’ll wait until I have enough beans to make a few pounds of tempeh, since Barry said that it’s really not worth it to do in small batches, and hey, you never know… maybe there will be a Part III of this tempeh series?!