Garlic Love

Garlic 1

I am the only person I know who didn’t get sick this winter. Sure I wash my hands frequently, and try to stay hydrated and well-rested, and sure I don’t work around kids, but you know what I think the actual reason is? Garlic.

Garlic 2

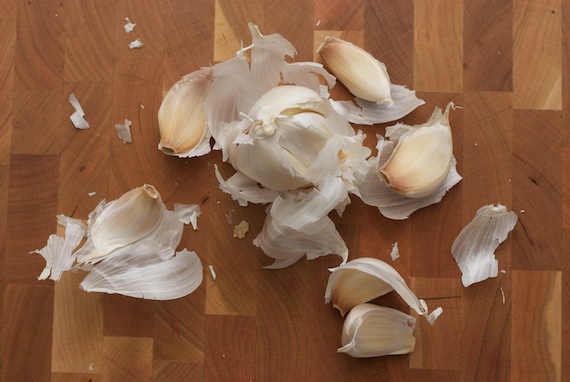
Garlic is a potent therapeutic agent according to both ancient wisdom and modern applications. Chinese herbal texts place da suan (garlic) in the category of “Herbs that Expel Parasites” because of it’s traditional use in treating intestinal bugs, but it appears to do much more. Modern research has not only explored garlic’s ability to kill parasites, but also its role in controlling hypertension,  blood sugar, cardiovascular disease, and most interestingly, garlic’s role in preventing the common cold. This Cochrane review concluded that although more research must be done to support the findings, there was evidence from a single study that suggested that garlic may prevent occurrences of the common cold. That’s the same conclusion I came up with, so: Eat your garlic!

Garlic 5

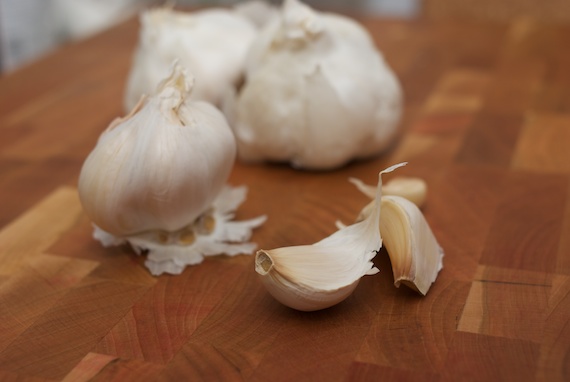
I’ve spent this winter throwing garlic into everything, and I really do believe it prevented me from catching whatever’s going around. I’ve also taken raw garlic (usually sliced thinly and swallowed whole) when I have felt a tickle in my throat or something coming on, or placed a small bruised piece of garlic wrapped in gauze in my ear for a few hours to treat an imminent ear infection. I know I sound like a kook, but it’s a trick I learned from my General Physician uncle who practices extremely practical medicine in The Netherlands. It works! This is all what we call anectodal evidence, however, so don’t quote me on it, and see my note below!

Garlic 3

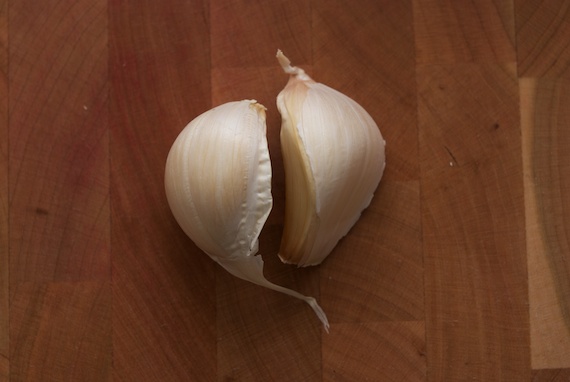
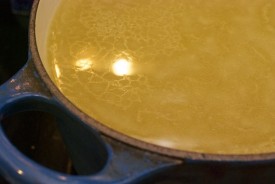
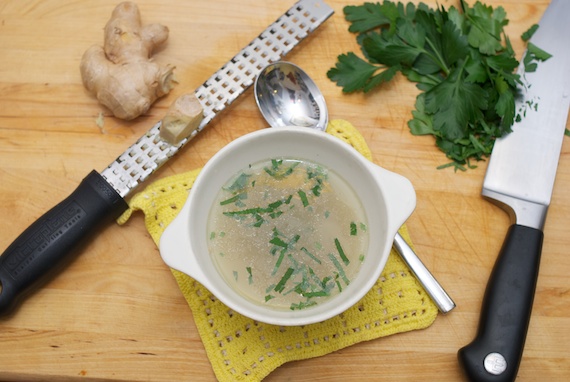
Back to cooking though: I find that adding garlic towards the end of the cooking time is most effective, since it’s more potent raw, but get it in however you can. You can always throw garlic into a simple miso soup recipe when you feel sick, and of course you can always up the garlic in regular recipes for an extra bug-. Here some links to recipes that feature garlic from Sustainable Pantry and around the interweb – so start cooking, and stay healthy during this crazy cold spring!

Carrot/Cumin Salad


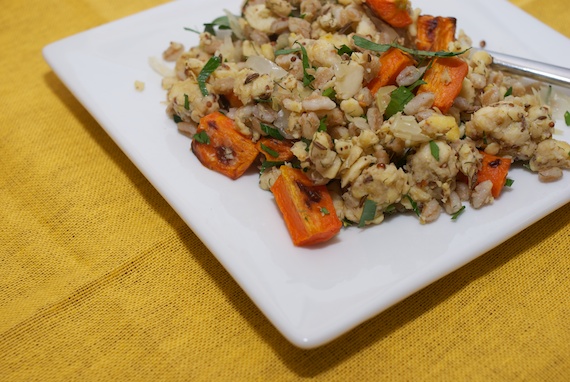
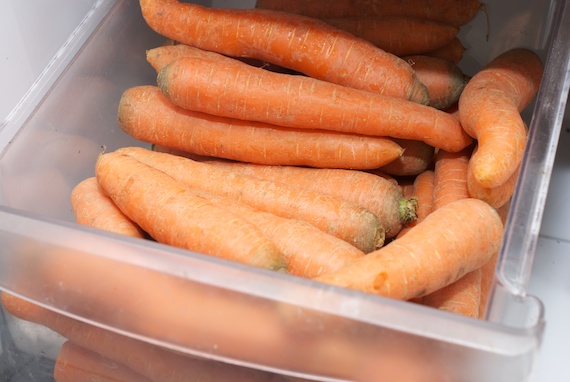
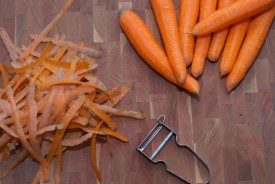
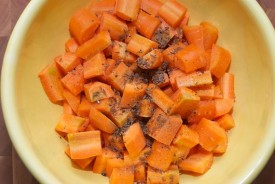
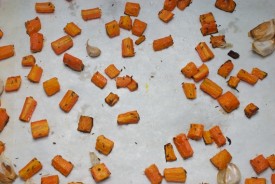
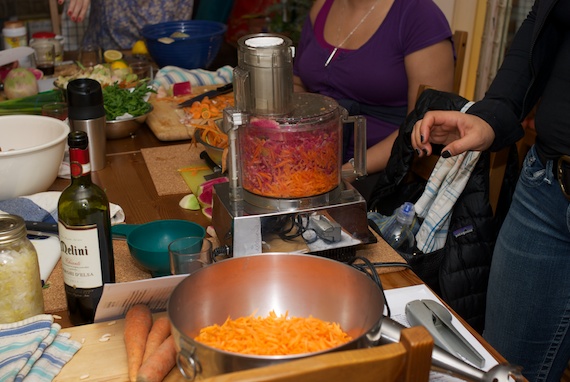
Sustainable Pantry: Moroccan Carrot and Cumin Salad


Polenta and Mushrooms


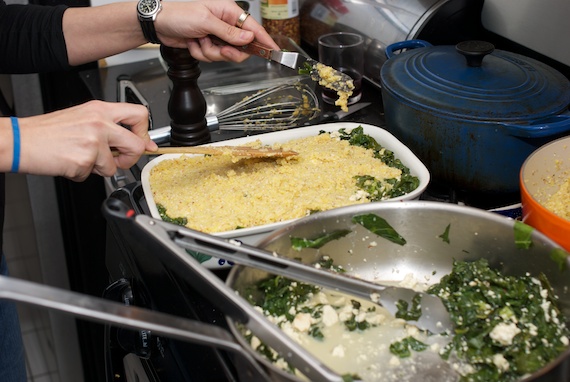
Sustainable Pantry: Polenta and Mushrooms


Other sites:

NOTE: This food website [sustainablepantry.com] is not designed to and does not provide medical advice, nor a professional diagnosis, opinion, or treatment. This website provides general food and cooking information for educational purposes only. The information, recipes and suggestions on this site ARE NOT a substitute for medical or professional care. You should consult your medical provider if you think you have a serious, or not so serious, health condition that you are concerned about. Do not use the information on this site in place of a visit, call, consultation or the advice of your physician or other healthcare provider. Before you incorporate garlic into your healthcare routine, consult with a medical professional.

Tempeh Part I: Warm Tempeh, Farro, Roasted Carrot and Caraway Salad

Tempeh 12

While I might catch flack for saying this, tempeh is the Rodney Dangerfield of vegan protein sources. Whether it is because people are more familiar with the other vegan protein that starts with a T (tofu), and so they confuse the two, people don’t know how to prepare it, or that it’s not often served in non-vegan restaurants so the general public just doesn’t know about it, but it just seems like tempeh don’t get no respect. I’d like to help change that unfortunate situation, and thanks to my afternoon plans, you guys will know all about tempeh soon enough! SPOILER ALERT! Part II of this series will be about my experience MAKING tempeh with Barry of Barry’s tempeh! I have been a huge fan of Barry’s delicious, organic, locally-made tempeh after buying a few packs from him last year at the New Amsterdam Market. When I saw him at the Queens E-Space event a few weeks ago, I re-upped on my tempeh, and we were chatting a bit, and I practically fell over when he invited me to help him make the stuff, which I’ll be doing this afternoon! I can’t wait to learn from Barry the Tempeh Master, contribute to his incredible product, and share with you a bit about the tempeh-making process.

Tempeh 5Tempeh 3

So now, let’s talk tempeh. Tempeh (pronounced tem-pay) is a traditional Indonesian fermented soy product with a whole lot going for it: Tempeh is unprocessed; it’s made from the actual beans (as opposed to tofu, which is made from the “milk” from soybeans)… what that means is tempeh is very high in protein and fiber. And since tempeh is fermented, it’s a super source of beneficial gut bacteria and is easy on your digestion. Its texture is similar to a bean burger, and it is a wonderful meat substitute since it holds up well to slicing, cubing, pan frying, roasting and crumbling while maintaining it’s pleasant, firmness. Tempeh is often sold in different flavors, which use slight variations in the recipe (more on that in part II).  Barry offers 3 tempeh flavors: the traditional soy, a soy-oats-and-barley, and a soy-free white bean-brown rice. Barry makes his tempeh by hand from organic beans and grain from Cayuga Pure Organics, and sells the 1-pound packages frozen.

Tempeh 1

Tempeh is pretty “meaty”, and holds up well to bold flavors. Often I marinate then roast tempeh, but another way I like to eat tempeh is crumbled into a pan and sautéed until crunchy. This warm tempeh salad idea was inspired by the flavors of the classic reuben sandwich, as well as the excess of carrots I have in the house (we got 16 pounds last week from our CSA – I’m not complaining!). I initially wanted to make the salad with rye berries to echo the traditional rye bread of the reuben, but when I went to the pantry, we were out — we’ve been eating grain like crazy pre-passover. Alas, I had farro, so I rinsed it and threw it in the rice cooker.

Tempeh 2

I told you I have a lot of carrots – and that’s not even all of them! I diced up the carrots and tossed with extra virgin olive oil, salt, pepper, caraway seeds and garlic and roasted in a 400F oven.

Tempeh 6Tempeh 10

Tempeh 4Tempeh 8

Can you find the carrot I tasted that’s missing from the picture on the right? YUM!

Tempeh 11

Meanwhile, I crumbled up the tempeh and tossed with a dressing heavy with whole-grain mustard, caraway seeds, garlic, extra virgin olive oil, apple cider vinegar, salt and pepper, and sautéed in a hot pan until warm and crunchy.

Tempeh 9

Once everything was cooked, I mixed it all together, added some chopped parsley, home-fermented sauerkraut, black pepper, and a splash of apple cider vinegar. The resulting salad really was reminiscent of a ruben, with the caraway, mustard and kraut coming through. Now that I’ve cooked with Barry’s tempeh, I can’t wait to see how it’s made…Stay tuned!

Tempeh

Homemade Marshmallows, and What To Do With The Leftovers.

Mallomars 6

It all started last week when we were planning for a s’mores dessert at our friends’ Eldad and Sheila’s house. Marshmallows are one of those foods that most sane people buy premade – like that other pillowy white food, tofu, and I suppose, graham crackers. While I do bake often, I have never even thought of making marshmallows from scratch and I didn’t even know if a home-cook could, or if you needed space-age technology and a huge factory. So I did some research, and I learned that while it’s not totally easy, it is feasible. After looking through many recipes I settled on one from Brooklyn small-batch candy-makers Liddabit Sweets. Bonus: I recently bought their cookbook, and had been dying to make something from it!

I have no pictures of the marshmallow-making process because most of the time my hands were way to sticky with either caramel or meringue or I was too busy using my candy thermometer. The technique is very scientific, involved ingredients I’m not at all used to working with, and since it’s been a long time since I’ve rigorously followed a recipe, I was a bit overwhelmed. Therefore, no documentation. But basically, a caramel is made with sugar, corn syrup and water. I initially balked at corn syrup, thinking WTF?! I’m not going to purchase that devil’s nectar! But after reading about it, I learned that it IS different from the high-fructose corn syrup that permeates industrial foods, and that it is necessary when making some forms of caramel, as it prevents the sugar from crystalizing. I figured since I was soooo out of my league already, I should just buy the corn syrup and follow the recipe as is. So, the caramel is made and then drizzled into a meringue, which softened gelatin is then added to. OK – let’s talk gelatin. I am not a fan, and I searched far and wide for a reputable agar-agar or other-thickener-based marshmallow recipe. When I didn’t find one that seemed reliable, I decided to throw caution to the wind, and go the way of the corn syrup, chalk this up to a once-in-a-cooks-life experimentation and use the gelatin. I schlepped to Aaron’s Kissena Farms kosher supermarket to buy Kosher gelatin, and while it didn’t make me feel much better, it did improve the ick factor by a bit.

Mallomars 1

Once the marshmallow ingredients were all mixed and I was running my stand mixer at high for what felt like forever (those things are LOUD!), I turned out the fluff into a sheet pan that was greased and coated with a corn starch/powdered sugar mixture. Once the fluff was all smoothed into the pan, another layer of corn starch/powdered sugar was added on top, and the marshmallows set at room temperature overnight. The thing was, I had a bunch of fluff leftover…. not an awful situation to find oneself in, but I had to figure out something to do. So I decided to pipe out the rest into little macaron-shaped marshmallows on another parchment lined baking sheet.

Once the fluff set overnight, I cut the congealed fluff into cubes and coated with more of the corn starch/powdered sugar mixture, and they finally resembled the marshmallows you buy in the store. Long story short, we did make s’mores with them, and while the my version was okay, they weren’t great. The texture wasn’t what we were used to – they were a bit ‘loose’, like they didn’t set up as well as they could have. AND we only ate, like 10 or 15 of them, and since the recipe made over 100, I had to figure out something to do with the leftovers. Hence, Mallomars.

Mallomars 2

A graham-cracker-esque cookie base was made (basic shortbread but with a bit-o-molasses, extra vanilla, and baking soda), and cut into little rounds the size of the piped-out mallows.

Mallomars 3

Then I realized that I had to temper chocolate for the coating. Yikes! I had one experience with tempering chocolate up until now: When I was 19 I worked in a classic French restaurant under a master chocolatier, Didier Berlioz, who could temper chocolate in his sleep, without any thermometers. While I helped him, I had never tempered on my own, but I had to now, there was no way around it – it was the final necessary step to complete my mallomars.

Mallomars 4

Tempering chocolate is SO out of the scope of this blog post, especially considering I didn’t do it correctly. After reading what Harold McGee, the Liddabit cookbook, wikipedia, and Martha  Stewart all had to say about tempering, I thought I was successful, so after I dipped the mallomars, I left them out on the counter to set, went to yoga, and came back to find them still tacky. So I hopped on twitter and enlisted the help of an expert: Gail from One Tough Cookie suggested I place them in the refrigerator, which I did, and voila (thanks Gail!) – the chocolate set – YAY! But, it has bloomed – BOO! Bloomed chocolate means that the cocoa fat has separated out and risen to the surface of the chocolate, in funky polka-dots. Bloomed chocolate is completely safe to eat, but it is undesirable, but what are you gonna do, right?! They still taste great. This really was a first, and although there were some fumbles along the way, I most likely will never make these again. I mean, I could be wrong, but…. probably not. And now to eat them and/or give them away in time before Passover starts….Mallomars 7

CSA Cooking Class: Winter Share Tips

CSA cooking class (1)

Tonight was not just any Wednesday night… Tonight my apartment was filled with 6 incredible women, and we chopped, chiffonaded and chatted our way through a bunch of root vegetables, creating a fantastic dinner. This was the first of what I hope will be a series of cooking classes that I am offering to members of the Tuv Ha’aretz Forest Hills CSA. Golden Earthworm Organic Farm, our CSA’s vegetable farm, supplied the awesome produce including a heaping bunch of collard greens, carrots, cabbage, watermelon radishes, and sweet potatoes – THANK YOU GOLDEN EARTHWORM! My intention with the evening was not so much cooking from recipes, but rather to review broad techniques which can be applied to a variety of the winter share vegetables. Last night was the last winter share pickup (sniff, sniff), and it was a HUGE haul including 8 pounds of carrots, 8 pounds of potatoes, 3.5 pounds of watermelon radishes, 3.5 pounds of beets, and more. Since Matthew and I get 2 winter shares, we have learned and improvised many uses for the bounty of root vegetables (HELLO 16 pounds of carrots!), and I wanted to share some of the tried and true techniques I use, as well as learn techniques from other members of our CSA. Here are the concepts:

Soup

Anything can be made into a soup. This is particularly true with root vegetables. Tonight’s soup was a coconut, sweet potato, ginger soup. It’s so simple, and no secret really – coincidentally Melissa Clark shared this concept with readers a few days ago. I made this soup earlier in the day because there’s only so much we could get done in a few hours, right?! Especially when mostly everyone brought red wine! (Did I tell you these ladies are awesome?!) What I did: peeled and cubed sweet potatoes, 1/2 large onion, 4 cloves of garlic, a few slices of fresh ginger, 1 can of coconut milk, zest and juice of 1 lime, covered with water, brought to a boil, then simmered until soft, then pureed. Served garnished with chopped cilantro. This soup will freeze really well, and making and freezing a batch now means an easy no-cook dinner on a balmy July night. This soup – and many pureed soups – are delicious chilled.

CSA cooking class (2)

Any root vegetable can be shredded. This is one of my favorite uses of carrots, beets, watermelon radishes, kohlrabi, anything! I have been making shredded salads lately with hella pungent dressings (think: tahini, whole grain mustard, lemon juice, sriracha, rice wine vinegar, sesame oil all mixed together –  trust me, it works!) which I toss with puffed grain and chopped herbs. Its an easy preparation that makes quick work of the veggies, and the salad keeps well in the fridge for a few days. Toss with puffed grain right before serving.

CSA cooking class 5

Anything can be layered between 2 sheets of polenta. Since we receive polenta from Cayuga Pure Organics through our CSA, we’ve found some fun uses for the staple grain, and one of the ones I like the best is using polenta as a “crust” for a “pie”. There are a lot of quotes in that sentence because it’s more like a casserole, but I’ve made it in a pie plate and cut it up like a pie, and it’s really cute! Tonight we built it in a Pyrex with a filling of garlicky collard greens (that’s where the chiffonade comes in) and crumbled tofu. We added some freshly grated parmigiano reggiano to the polenta, which gave it a nice creaminess. Since the whole dish is cooked on the stove top, and all the ingredients are cooked when the pie is assembled, so it’s not even necessary to cook in the oven if you’re in a time pinch, but tonight we threw it in a 350F oven for about 20 minutes. Other things that can be used to round out the filling are beans, lentils, tempeh or any sautéed vegetable.

CSA cooking class 3

Everything is better when it’s cute and individualized. In the summer CSA season, we receive a variety of fruit in the fruit share, but being that we’re in the Northeast, winter season’s fruit share is apples. When I think of an easy apple dessert, I think individualized apple crisp. It’s always fun to make little, individualized anythings, and I love that everyone had the chance to participate in making their version. After we all peeled and cubed the apples and put them in the bottom of a ramekin, we topped with a mixture of rolled oats, shredded and flaked coconut, ground and sliced almonds, coconut oil, cinnamon and sugar. I planned on running a vegan class tonight (the late addition of the parm to the polenta was ad lib) so we used Earth Balance, but I typically use butter. The trick to this dish, which I learned from my father and I think was the first dish I actually learned to make, is to be sure to put a few extra cubes of butter on the top, so it melts and oozes down through the topping and into the apples below. The butter is what makes it crisp.

CSA cooking class 4

Tonight was a bit of an experiment, and I think it went great! Everyone went home with leftovers of good food, new knife skills, tips and tricks to tackle their refrigerators full of root vegetables. There is nothing I love more than standing around a table, cooking, chatting and drinking with old and new friends, and on a Wednesday no less – success! – thank you to the great women that came out!

For Queens Peeps: Registration is open for the 2013 Spring/Summer/Fall season! We are filling up quickly, so if you’re interested in participating, please sign up soon! Click HERE for the online registration, and click HERE for more information about our CSA.

Chicken Soup: STAT!

Chicken Soup

Winter may be drawing to a close, and the weather may be getting warmer, but from a Chinese medicine perspective this unpredictable seasonal change is an important time to eat healing, balancing soups. March is crazy like that: the wind is still whipping, there’s a chill in the air, and there’s still that nasty cold/flu/virus going around. There are actual snowstorms followed by 55F days with bright sunshine and clear skies! It’s bonkers, and it’s times like this that eating warming, simple soups will keep your body strong, fortified and grounded. Chicken soup can be made at a moments notice with little effort and preparation, and often there are plenty of leftovers which can be stored in the freezer, to be thawed at a future time of emergency healing need.

Chicken Soup 1

As a kid, whenever I was starting to get sick, my mother would put up a big pot of chicken soup. Her soup was not like the typical brothy chicken soup – she threw in dried mushrooms, tons of dried herbs and large chunks of vegetables like carrots and celery. She didn’t strain the soup either, just shredded the meat off the simmered chicken legs, and added it back to the pot. It ended up more like a stew, and it always did the trick. I’ve continued this tradition of throwing together a pot of chicken soup when Matthew or I start feeling a cold coming on and need a little food support, as I did a about a month ago when I was feeling run down.

Chicken Soup 6

So what’s really doing the healing here with this Jewish Penicillin? Is it the warm liquid of the broth that helps clear stuffed nasal passageways? Is there some stort of inflammation-mitigation from chicken soup which lessens the cold’s symptoms? Is it the nutrients in the vegetables themselves? Is it that chicken soup balances the body’s constitution?  Is it the comforting of a familiar food ritual? I would argue that it’s all of the above, and more probably. Chinese medicine builds herbal remedies much the same way as chicken soup. Six, eight, sometimes up to fifteen or twenty herbs work synergistically in an herbal decoction, just the way the chicken, vegetables and herbs play off each other to create this rich, complex, healing soup.

Chicken Soup 3

The Chinese approach to treatment in general is whole-foods based. In traditional herbal formulas, the actual branches, twigs and leafy herbs are boiled into a tea – kind of like a bouquet garni, right? My bouquet garnis tend to be huge herbal packages that I tuck into my soup as it cooks. In this version, I used parsley stems, thyme, black peppercorns and dill, all wrapped together in a cheese cloth, which I fished it out at the end. Sometimes I throw in other healing ingredients like ginger, goji berries and dried shiitakes for a super-souped up bouquet garni.

Chicken Soup 4Chicken Soup 5

One of the great things about chicken soup is that recipes are not necessary. At the most basic level, soup is just vegetables, herbs and spices (and sometimes meat), simmered in water on the stove-top. While you can add a additional steps to that basic formula (sautéing or roasting the vegetables first, straining the end result, adding noodles or dumplings or rice or matzoh balls), you don’t have to. And as you can see through the pictures above, my chicken soup is pretty basic. I first lay the chicken legs, then whatever veggies I have around, (in this case carrots, turnips, celery, onions and garlic), salt it up, add the bouquet garni, cover with water, and bring that baby to a boil.

Chicken Soup 7

After the soup comes to a boil, you will notice some white, foaminess come to the surface, especially around the edges. Skim that foam off! I am a proud soup skimmer. Not only do I think that skimming creates a cleaner, clearer broth, but I love the zen of the skimming itself. When I skim, I think about life, about soup, about this, about that… It’s my little moment of cooking-meditation. Once skimming is complete, cover the pot, and allow the soup to cook on low for a few hours.

Chicken Soup 9Chicken Soup 10

When the soup is done, strain the broth and pour that golden healing liquid back into the pot to cool. You might notice some fat coming to the surface – keep it there – This fat is good stuff which will help keep you strong. But if you are super sick, very weak or recovering from a serious illness, skim the fat off. According to Chinese medicine, when you are extremely weak, even chicken soup is to heavy to easily integrate and digest. To serve, you can eat/drink the broth on it’s own in a mug or bowl, or it can be bulked up by adding carrots, and/or dumplings/noodles, and/or fresh herbs. Above, I decided to add dill spåtzel, which I had never made before, but which I felt like would provide the right accompaniment to the broth. While they didn’t come out like I wanted, they were delicious. (For some reason I didn’t take pictures of the spåtzle-making-process, but this post is super-long anyway, so I’ll do a separate spåtzel post in the future when I try my hand at it again.)

Chicken Soup

We went through the first batch of refrigerator soup within a week, and I never did end up getting sick. Then, yesterday with this crazy March madness, I felt that ominous tickle-in-my-throat-maybe-I’m-coming-down-with-something-thing, so I reached for my emergency stash of frozen broth (STAT!), reheated it, garnished it simply with fresh grated ginger and chopped parsley. No fuss, super easy, and voila – the pantry pulled through with a prescription! And I AM feeling better today.

Note of chicken vs. vegetable soup: This formula can be followed without the chicken for sure, and the end result will be a delicious, rich, healing vegetable soup. I often make vegetable soup like this, but in these cooler, winter months and during this seasonal-change-craziness, I do like to add some meat to my soups to give them a more warming, nourishing quality. When adding chicken to my soup, I use legs from Fleisher’s, a butcher in Brooklyn that sells sustainably-raised, pastured chicken. I source my meat from there for ethical, environmental and taste reasons, and I would encourage you to use the best quality chicken that you can find.